Monday 30 September 2013

Lilly Pulitzer Floral Nails


We are technically almost a whole month into Spring here in Perth, but it's been raining almost constantly with storms and such. On Saturday however, the sun was out and I felt inspired to do a Springtime floral manicure.
 I did a quick hunt through my Pinterest floral inspiration board and found a lovely Lilly Pulitzer floral print which I will post down the bottom of this page.


For these nails I first painted my nails with OPI "Funny Bunny'. This is a white jelly polish which builds to opaque in 2-3 coats. For me, at 2 coats I could still faintly see the nail line, but it looked.....nice.

In fact, I think I might prefer it to opaque creme white polish (I use OPI Alpine snow). It's not as stark white- it just looks so clean and jelly-ish!
Here's a pic of it before I painted the flowers.


Anyway, back to the flowers....
Over the white base I used Essie "A Crewed Interest", Revlon " Lilac Pastelle" and a little bit of China Glaze "For Audrey" to paint a messy base for the flowers (I kind of painted roses). I added a little bit of acetone to the brush when I did this to thin them down and make them more like watercolours.

Next I used a short striping brush to paint the flowers in a darker pink (This was a custom mix of a creme white polish and Seche Vite "Rendezvous" thinned with nail polish thinner).
They weren't too hard to paint to be honest as they are meant to look a bit messy.... which is good for me!
I started in the middle and worked my way to the outer petals. 

I then used a short spotter brush to paint the flower centres in Misa "Office Polish-tics".

The picture below was painted with my left (non dominant) hand. Not as good as the other hand, but I'm improving- practice makes perfect!


Oh and last but not least I filled in the background with some more acetone thinned China Glaze "For Audrey". (When I say acetone thinned, I mean I dipped the brush first in acetone, and second into my polish).


I really really love this manicure. It looks even better in real life when your not looking so close up!
I keep trying to pick my favorite nail- It's a toss up between the pointer finger on my left hand and the thumb on the same hand! (above)

This picture above is probably the best one, but I took it a day after I had finished the manicure, and the pinky nail seems to be all scratched. I really need to find a thin fast drying top coat for re-freshers before taking pictures. All I have is seche vite which can cause shrinkage when used on dry nails (and is also very thick). Does anyone have any suggestions?


And here is the print I used as inspiration.... or can I just say I copied it?

http://blog.lillypulitzer.com/2013/02/07/a-print-worth-celebrating-lucky-charms/


Thanks for reading :)

Chanfie
xx

Friday 27 September 2013

AFL Grand Final Nails! Go Freo!

Clearly my Freo nails last week at the Prelim final were very good luck as they won and are off to the Grand Final. This of course meant that I needed to think of some different Fremantle nails to last week (here). Now I really liked those nails, and considered just doing the away colour jersey (reverse colours- purple on white), but I wanted to be more creative. I chose to incorporate the red and green that they used to have along with the purple and white. Plus I really wanted to create a way to use my new picture polishes (Sea Jewel and Violet Femme).


 I again stamped the anchor from the bundle monster 2010 collection (konad white polish).
I used striping polish to create the different stripes/triangles. 

The polishes were:
Picture polish violet femme (purple), 
Picture polish seafoam (green glitter) 
This was painted over Sally Hansen Xtreme wear The real teal
And Misa Bop Til You Drop (coral)


It took ages, but it will be worth it tomorrow!!! 
I'm going to Fremantle to watch the game and I'm ridiculously excited =D


 Here is a picture from 2006 of the old team colours I was trying to channel

Dockers
Source: http://www.heraldsun.com.au/sport/afl/fremantle-dockers-survivors-chase-redemption-for-2006-preliminary-final/story-fni5f6su-1226719142368

 Thanks for reading :)


Thursday 26 September 2013

Liebster award :)


So I have been nominated by Nailallure for the Liebster award. To the best of my knowledge the Liebster award is not really an award, but a way for new bloggers to discover other new blogs/ bloggers, be discovered by fellow bloggers and help each other feel appreciated!

When you are nominated you are meant to:
   1. Share 11 random facts about yourself.
   2. Answer 11 questions given by the person who nominated you.
   3. Nominate 11 more bloggers with less than 200 followers
   4. And then write them 11 questions to answer.

So I guess it's like a friendly blogger chain letter.

So, here we go. First up my 11 random facts: 

1. I am engaged to my high school sweetheart- we met walking home from school the same way every day.

2. I have never broken a bone (Knock on wood!)

3. I want to move out of the city into the country

4. I always come last in running races

5. I've studied 2.5 years of a Chiropractic degree. I dropped out and am now doing a PhD in cancer research.

6. I'm a dog person  (but still love cats!)

7. I have a home-made tattoo of a smiley face on the back of my left hand. I recently tried to have it removed and now it's scared.

8. I was born left handed, but my Grandmother taught me to be right handed.

9. I have read the Harry Potter books many many times over. (I think the first few I have read more than 20 times)

10. I'm an only child, and on my Dads side of the family an only grandchild.... yup I was spoilt rotten growing up.

11. I drive a blue Mazda 3


And next my answers to the 11 questions posed by Nailallure :


 (By the way, Nailallure as I couldn't find your name on your blog anywhere I figured you would prefer I didn't use it. I really loved your blog so I'm following you on bloglovin' now)


1. What/who inspired you to blog?
I can't really remember what was the trigger that made me decide to start blogging. I started taking pictures of some of my nail art over a year before I started blogging, and didn't really know of anywhere but Pinterest and Nails Mag to share them. I wish I had discovered reddit laqueristas!!

I like taking pictures of my nail art because then I don't have to feel sad when I remove them or they chip.
I guess I was also inspired by all the other amazing nail art bloggers out there. In particular I used to (and still do) follow Pshiiit.com, Chit chat nails, So Nailicious and Manicurator (There's a lot more now that I follow, but back then I only knew of these!).

Once I actually started the blog I found it motivated me to try a lot of different techniques I hadn't tried before, and that's why I keep doing it.


2. What is your favourite brand, finish and colour of polish?
I'm a bit boring - My favorite polish brand and the majority of my collection is OPI. I haven't really tried that many brands- mainly because I'm in Australia and it can be tough to get a hold of a lot of different brands at reasonable prices. I have got my first picture polish waiting at the post office for me currently though =D

My favorite finish is creme with a shiny seche vite top coat. (Boring again!)

And colour- anything turquoise!

3. What is your favourite type of nail art and how long have you been doing it?
I guess I'd have to say stamping. I find it to be the quickest easiest way to get a really professional look. I started stamping in September 2011 :) For those who don't count stamping as nail art, my answer would be handpainted designs. I'm trying to do more of this when I can make time. 

4. What is your hand care routine and what are your 3 favourite hand care items?
I have some Dr Lewinns hand and nail creme on my desk at work which gets used a lot. I also use my Burts bees lemon cuticle creme a fair bit. Before most manicures I put some CND cuticle away over my cuticles and push them back a little bit. I guess I don't really have much of a routine!


5. Do you have other hobbies other than painting your nails?
Wine tasting! Me and my partner head down south to Margaret River once or twice a month to taste and buy wine. He says I should call it wine appreciation so I sound less like an alcoholic haha. My favourite wineries are Brown Hill and Pierro, and favorite types of wine are Chardonnay and a toss up between Cab Sav and Shiraz (depending on the wine I guess).

6. What is your favourite polish and favourite beauty product?
My favourite polish is OPI Fly- a beautiful bright perfect turquoise.

It's really hard to pick a favourite beauty product! I think the urban decay eye shadow primer potion is pretty awesome for making my eye shadows last longer and not crease. I'm trying to think what I couldn't live without..... my brush? I love my brush! It's an 'Expert Classic Porcupine Brush (Large) by Nin9ty Nin9' .... and nail polish of course.

7. How do you take photos for your blog?
I have a Nikon Coolpix bottom of the range camera. I used to take pictures in the window, but come Winter that was no good because I get home too late.

I then made a lightbox out of a cardboard box and white tissue paper. I couldn't get my hand and fingers to look nice on the weird angle that I had to be in to get a picture in the lightbox. Soooo in the end I covered up my desk lamp with the same white tissue paper and I take a picture on my desk with that, using the leftover tissue paper as a background :)

I put the light on a tissue box to raise it up the the right height, and rest my camera on a box of seche restore so I'm less shaky and click away!

8. What is the biggest challenges you've faced with your blog?
As you can see from my answer above, the picture taking was a bit of a challenge but I'm happy with them now. Also, all the code writing to add links and pictures has been hard, but also kind of fun to learn. I think I will soon have to categorize my index page, so that's going to be hard. By chance does anyone know how to make a non-post page in blogger that doesn't have its own tab?

9. What technique that you have not yet tried yet would you like to master?Hmmmmm I want to learn how to paint realistic flowers. I have kind of tried it though (and not posted the results yet) , but not with acrylics. I think I need to try acrylic paint.

10. What's your go-to mani when you're pushed for time?
Stamping!!

11. What mani are you most proud of, and why?
Hmm off the top of my head probably the Egyptian hieroglyph one I did recently. I felt like it was a unique design, and I was really happy with how it turned out.

And now to nominate 11 bloggers with less than 200 followers :)

I decided to also choose all nail art blogs :)
Many of these blogs I had not previously visited, and I'm so glad I was nominated to participate in this 'award' because otherwise I never would have found them.

In no particular order.....

1. http://nailaday.blogspot.com   I think I came across this blog on Pinterest. Really eyecatching designs.

2. http://thelacqueredstash.blogspot.com.au  - One of my precious 9 followers <3 And a fellow reddit laquerista!

3. alittleblogbyayaka.blogspot.co.uk -I came across Ayakas blog on bloglovin'. I haven't had much time to look through, but the few posts I read were really helpful, and her nails are beautiful.

4. http://nailsmiles.com/ - I noticed Emma's lovely nails on reddit lacqueristas :)

5. polishedprescription.com Hi Kelsey- Nice nails, and your blog name and by-line made me laugh :)

6. http://malepolish.es/ - Gotta have some gender diversity here. This is a relatively new blog with lots of nail polish ideas for men (but also woman!). I like it- written short and to the point!

7. http://fancyside.blogspot.com  Another fellow r/laquerista *waves*

8. http://colorfulharmony.blogspot.com : Another of my precious few followers. Beautiful nails and I can't believe you manage to write your blog in 2 languages!

9.http://punchnails.blogspot.com - Super talented with only 8 followers currently! Check her out :) Oh and shes a fellow Aussie!

10. http://partialtopolish.blogspot.ca/ Only just found this blog in my hunt for <200 follower nail art blogs - and wow I'm glad I did! Great stuff and I love your nail shape! I'm trying out a slightly more rounded look at the moment!

11. http://www.peacockpie.com/ Ooo another amazing nail art blog I've not visited before!

My questions to you, along with listing 11 random facts about yourself, are:

(and I stole a few from the questions I was asked)

1.   What/who inspired you to blog?

2.   Keeping with the 11 theme of this award, what are your 11 favorite polishes?

3.   What is your favourite type of nail art and how long have you been doing it?

4.  Do you ever experiment with different nail shapes/lengths? Which is your favourite?

5.   Do you have other hobbies other than painting your nails?

6.   What non nail related beauty product could you not live without?

7.   How many photo's on average do you take of each mani?

8.   What is the biggest challenges you've faced with your blog?

9.   What technique that you have not yet tried yet would you like to master?

10. What's your go-to mani when you're pushed for time?

11. What mani are you most proud of, and why?


I hope you will be able to make the time to give this award/chain blog post a go. I'm really happy I did and found all of your blogs. Now I just need to make more time to read them more thoroughly! Post a comment on this page when you are done so I can read your answers :)

Have fun

Chanfie
xx

Wednesday 25 September 2013

Chunky Blue Handpainted Flowers

I did these about a week ago and wasn't very happy with them so took a few quick pictures and tried something else. They don't seem to look so bad in this picture (the only one which turned out!) so I decided to post it.

The background polish I used was OPI I don't give a Rotterdam. This is a really pretty colour, but I think it would benefit being layered over something else (maybe a medium blue or white). It took 3 coats for this opacity, and there was still some slightly bald patches.

I painted the flowers using a flat eyeliner type brush first in OPI Eurso Euro
 (how bright and awesome is that blue?!).
I then coloured this in with a finer brush using OPI thanks a windmillion. In the centre of the flowers I used OPI fly, and a little bit more thanks a windmillion.

And that's it for these nails!

Saturday 21 September 2013

Freo Dockers Nails!


Well... I never ever thought I'd do 'sports nails' but here we are.


The West Aussie AFL (Australian Football League) team - the Fremantle Dockers is one game away from making the grand finals and it's a home game!
My parents are Freo Docker members and my Dad has abandoned my Mum for a private box leaving me with a ticket =D

I've been getting into the footy a lot this year. All the boys were always talking about their dream teams non stop at the start of the season, so me and a friend joked about making a 'dreamy team' where we would pick the most attractive players only...... and we ended up actually doing it.

I watched every game I could this year and I think next year I'll make a proper dream team :) I was getting so annoyed when I couldn't pick my favorite players because they weren't 'dreamy' enough!

So anyway, between going to the game and actually enjoying football in general, I guess that's how I ended up doing team nails :)

*Update* I did more Freo nails for the grand final here 


The team colours are purple and white (previously there was also green and red- but they seem to have rethought this colour clash!). I handpainted the lines instead of using striping tape. Partially out of laziness, and partially because I'm not very good at using striping take yet!
The logo is an anchor, which I luckily had a stamp for from the bundle monster 2010 set.

The polishes I used were:
White nail: OPI alpine snow
Purple: OPI Vant to bite my neck?
White stripes: LA colours striping polish


And here is a picture of the team (in 2012). As you can see I kinda screwed up and only did two chevron lines instead of three- but oh well- close enough!!


The Dockers pose with the Western Derby Trophy after winning the round 19 AFL match between the Fremantle Dockers and the West Coast Eagles at Patersons Stadium on August 4, 2012 in Perth, Australia.
Source: http://www.watoday.com.au/afl/afl-news/reports-spoil-fremantles-massive-win-over-eagles-20120804-23mvs.html


Thanks for reading, and Go Freo!!

My First Jelly Sammich! Filled with Delicious Glitters and Flowers

 This is just a quick little post because I have a few today- I got behind!

Quite a while ago there was a really cool jelly sandwich mani on reddit lacqueristas (link). It's been on my to try list for quite some time, but I never owned any jelly polishes... well except for OPI dating a royal, but I never realized that it was!
Anyway, I have been dabbling in making my own polish for quite some time, but untill recently I didnt have any coloured pigments (I was just making glitter top coats). I finally got around to getting some pigments and with them I was able to make this deep vampy red jelly with golden/bronze glitters. I was lazy and used a stamp to add the flowers between layers of the jelly polish. (The stamp is from konad M66)


Thanks for stopping by <3

Tuesday 17 September 2013

Egyptian Hieroglyphics!


This weekend I couldn't decide what I wanted to put on my nails. I wanted to do another black and gold look after seeing this amazing mani from Paulina's Passions. I asked my fiance and he came up with a great idea!- Egyptian themed nails. I decided to go with some Hieroglyphs. 

I first painted my nails with China Glaze Passion from the Romantique collection, and added a coat of Seche Vite and waited for it to dry before applying striping tape horizontally across my nails. I then put 2 coats of OPI Black Onyx over the top and removed the striping tape to reveal the gold below. 

It looked quite nice just like this so I took a picture :) I wish I reversed the polish bottles- you cant see where my nails end and the OPI black onyx bottle begins!


Next I used a short striping brush to paint the hieroglyphs in China Glaze Passion. Originally I was going to have it actually mean something, but I soon realized that there was a limited number of characters that I would be able to recreate in the small space between the gold stripes. So it's probably complete jibberish! 


The left hand nails were ok, but I had a lot of trouble painting the right hand nails with my non dominant hand. They are a little clunkier, but I think I nailed the bird on the ring finger! (below)


 I did a closeup of this thumb because I was proud of the little Egyptian person. I think he looks like he is doing some sort of kung fu though. 

And that's it! It was pretty fun painting these, but took forever! When I finished I literally looked up from my hands and exclaimed "oh my gosh! It's night time".
Here's the hieroglyphs I used for inspiration :) I have actually seen this in real life at the Louvre! 


reference: http://ritournelleblog.com/2010/12/23/ancient-egyptian-treasures-at-the-louvre/
Someone asked about what brushes I used for this mani, so I figured it would be easiest to take a picture (below).  I mostly used the shorter brush, but used the longer one for a few things that had to be extra fine (as you can see it's thinner, but as its long, it's harder to control). These are just the cheapo 'striping brushes' from ebay that are available from many sellers. They do alright, but as you can see the bristles are a bit fanned, and the paint on the handle isn't acetone resistant. I've actually ordered some new La Corneille brushes on recommendation from Lindsay from WondrouslyPolished.com - so I'll write a little review when they arrive and I have tried them out!


Thanks for visiting my blog <3

Thursday 12 September 2013

Tribal Print Nails Inspired by Wondrously Polished

About a week ago Lindsey from Wondrously Polished did an absolutely stunning Navajo tribe inspired manicure (link). If you haven't ever visited her blog I highly recommend having a look. She is very creative and is always coming up with beautiful and unique designs. 
Anyway, after repetitively visiting her blog to see it again and again I decided I wanted to try a similar manicure.

In the past I have shied away from hand painted manicures, fearing that it would look like a blobby mess, but once I found the right brush (a striping brush on the shorter side) it wasn't as hard as I thought to create crisp lines and designs. I put striping tape horizontally across my nails in lines to make sure I kept the designs parallel and this also helped.

I really enjoyed free handing. It was really fun and relaxing just painting whatever came to mind. I think I'll be doing a bit more free hand nail art from now on.

Here is my right hand- I think this hand turned out better which is weird having been painted by my non dominant hand! The thumb nail looks a bit weird and lumpy though as it broke and I had to patch it up with a tea bag and nail glue. 


The polishes are used were:
Background white/grey: OPI my boyfriend scales walls
Bright Orange: OPI atomic orange
Dark turquoise/blue: China Glaze Shower together
Lighter turquoise: OPI Fly


Thanks for visiting :)


Sunday 8 September 2013

Water Sparbling Again. Hoorah! It Was Meant to be Turquoise Stone...


This weekend I went along to my very first Perth Polish Posse (PPP?) meet up. Seeing as it was the first time they would be meeting me I was inspired to do something a bit more special on my nails- break out of the stamping slum that I've been in for a few weeks. Not that stamping isn't awesome.... it's just so easy to get a great look that when I'm being lazy I default to it.

I chose the most complicated technique I know of! Water marbling and water spotting (which I have dubbed water sparbling: tutorial here).
I wanted to do a turquoise stone look with some gold veins running throuhg and totally didn't nail it..
But.... it looks pretty interesting anyway


I struggled a lot trying to take pictures of this one. I ended up taking a total of 103 photos.  I think the one above is the best. 
I love love love that middle finger. It reminds me of a peacock feather. Water sparbling is so unpredictable!


The polishes that I used were:
Bright Teal: OPI fly
Black: Sally Hansen Xtreme wear in Black Out
Gold: Saly Hansen Xtreme Wear in Good as Gold
The metallic teal (this didn't show up much in the photos) is Revlon Ocean Breeze.

Do other people freak out about wasting there good polishes on a water marble? I never touch my OPIs or Essies for marbling!


This one (above) is the only close up shot I got of my right hand. You can see it got a few spotted bits on the ring finger. For the water spotting, this time I used a makeup brush cleaner spray that had alcohol in it (the Priceline pharmacy brand- incidentally.... don't buy this for cleaning makeup brushes- it hardly does anything!)


 Thanks for stopping by :)


Pink, Gold and Rose Nails


This was just a quick manicure I did before I went out for dinner a few nights ago, but it ended up looking really nice. Pink and gold always seem to look great together no matter what you do :)


The dusky pink polish is OPI Dulce de Leche.
This polish seems to look pink when pared with some colours, and more of a nude when pared with others. I assume it looks very different with skin tone too.
I think it would be a lovely polish to wear if your work is conservative with nail polish. It's a nude, but not a nude :)


The stamp is from big SDP A, from Dashica Beauty.
I used Essie Good as Gold to do the stamping. 


And this glitter polish is homemade :) I think its my favorite that I've ever made so far! I got the large to small glitter ration just right! I wish I had weighed the ingredients out so I could replicate it.
 
Thanks for reading :)

Friday 6 September 2013

A Comparison of Stamping Plate Sizes

I very recently did a big guide to stamping with reviews of all my stamping stuff. I realised I didn't include measurements of all of my stamping plates, something that I have searched the internet desperately for many times when looking to purchase a particular set of stamping plates. This was after I bought the bundle monster 2010 plates on which the full sized images are ridiculously tiny.

So I measured the dimensions of the full size images on all of the plates that I own and made a chart (The ones I personally measured are in black). I then did some research and added some other sizes from plates I don't own (blue). The references are below the chart. Hopefully this chart will help anyone with large nails, be they long or wide find big enough stamping plates! For reviews and store links please visit my original post here

Please note that the diagrams are not perfectly to scale. Read the measurements!
Here is some conversions to inches :)

10mm= 0.39 inches    12mm= 0.47 inches        14mm= 0.55 inches       16mm= 0.63 inches
18mm= 0.71 inches    20mm= 0.79 inches        22mm= 0.87 inches
Bundle Monster 2011, Red angel, DRK A: Ninja PolishLea Lac: Lacquer or Leave Her (I had to measure the plates on the screen and compare to the konad in the same image. Its probably not 100 exact due to the angle the picture was taken on so that's why I put the 'approximate' symbol')Pueen: Amazon Reviewer Mash 2012: Oooh Shinies
Salon Express: No Nude Nails
Winstonia: No Nude Nails
Bundle monster 2013: Katsy Nail Crazy  (The 0.5 is because she said it was the same as 2011 collection and I had a different measurement from her. May be an Inches to mm conversion issue?) 

Hope this helps someone :)

Also If you own any plates that I don't have measurements for (ie. the new konad plates) I'd love to get the measurements to add to the chart!

Dotted Gradient With Purple and Autumn Colours


There has been a few really pretty dotted gradients on Reddit Laqueristas lately, and I really wanted to give it a try myself. I meant to do a purple gradient, and somehow ended up choosing these very Autumn colours- silly with it being Spring and all...oh well!
I used the smallest dotting tool I own. Dotting tools are readily available on ebay (search nail art dotting tool), or you can make one by sticking a pin into the rubber on a pencil (or just use the tip of the pin if your aren't scared of sharp things!)


I started off at the base of the nail with the dots more spaced out, but ended up putting them closer together by the end. I think I prefer them bunched up.


The polishes I used were (starting at the base)
1. Rimmel Pro: Nite Flight
2. Mix of Rimmel Nite Flight and OPI Casino Royale
3. OPI: Casino Royal
4. Sally Hansen Xtreme Wear: Grey Area
5. Essie: Island Hopping
6. OPI San Tan Tonio
7. Rimmel Lycra Wear: Ash Rose
8. OPI Planks a Lot. 


Thanks for reading :)

Wednesday 4 September 2013

Minty Stamping with Cheeky Viva Mexico

This manicure is the one I did when I was making the stamping tutorial.
It's a little meh...I removed it after only 1 day.

I think I am disheartened as I cut my nails too short =(
I thought it would be a good idea to cut my nails while I was wearing nail polish so I could concentrate better on the shape, and I went overboard. 
Hopefully they will grow back fast!


The green polish on my thumb, pinky, middle and index fingers is OPI 'Gargantuan Green Grape'
The White/grey on my ring finger is OPI 'My Boyfriend Scales Walls'
The ring finger is stamped with China Glaze Aquadelic
The thumb is stamped with Konad white stamping polish
The glitter is one that I made myself. It has a mixture of  matte white glitters, and then these whitish glitters that change colours (the whole rainbow!) in the light. 


The stamp is from Cheeky's 2013 jumbo collection: The Viva Mexico plate.


Thanks for reading :)

Chanfie
xx


Monday 2 September 2013

Everything I Know About Nail Stamping! (Updated regularly)

Nail Stamping Tutorial, Tips and Tricks, and Where to Buy Nail Stamping Supplies with Reviews :)


I've been meaning to make a tutorial for nail stamping for quite some time now. I'd been focusing on making tutorials for more complicated techniques, and realized that I had been neglecting the one that I use more than anything else..... and therefore (I hope) have a lot of wisdom to offer.

For those that don't know nail stamping is a technique that allows you to transfer pre-designed patterns and images onto your nails. Hard to explain without pictures so scroll down a tiny bit to see the tutorial. It's a very easy and fast technique once you get the hang of it to create beautiful nail art. All you need is a stamping plate (This has the designs engraved into it), nail polish, a plastic card (to scrape excess polish from the plate) and a rubber stamper to transfer the nail polish from the engraved plate to your nail.

Here is the tutorial, and below I'll add some more tip and tricks. I have also written a guide with reviews on the nail polishes I use for stamping, the stampers I own and all the plates I have.  There are links to manicures labelled with each plate type in every stamping plate section :)

Contents of this page:


Stamping Tips and Tricks!

  • Make sure that your base coat is completely dry before you try stamping! I usually put a coat of Seche Vite to speed this up. Otherwise stamping will smoosh the base polish
  • Using a topcoat before stamping has another advantage. If you make a mistake, you can carefully use an acetone soaked cotton pad/qtip to remove the stamped polish. I have heard that if you are quick, rubbing alcohol can be used too (Although I've not yet tried). It apparently can remove wet polish, but not dried polish. 
  • Have all the utensils cleaned and easy to pick up before you begin. Especially the stamper- once you scrape you will need to press the stamp onto the image ASAP!
  • In my opinion, the most important step is the scraping- I scrape very fast!!! (I used to go slowly, and then I purchased an image plate- XL-A, which wasn't very good, and had to refine my technique in order to use it. Scraping as fast as possible was required to pick the image up)
  • Also, on scraping, you need to perfect the pressure that you scrape with. Too hard and you will remove too much polish from the indented image on the plate but too soft and there will be excess polish around the image. I scrape at an approximately 45 degree angle (a smaller angle is better than larger). 
  • After picking up the design on your stamp, before you transfer to your nail, always check that you have picked up the whole image, and don't have excess polish. 
  • When you purchase a Konad stamper it will come with a little plastic and metal scraper (see image under Stampers, Konad). I highly recommend using a plastic card instead- ie. a store card, used gift card, etc. You have a larger surface to scrape with so it's easier, and it won't scratch the plate like the Konad metal scraper. 
  • After you purchase a nail stamper, they usually need to be filed with a nail file slightly. This creates a little bit of texture to pick up the image. Do it bit by bit to avoid over filing (File a little bit, try stamp.... and if you are still having issues picking up the image, file a little more).
  • When stamping the plate to pick up the image I press straight down once. 
  • When stamping onto my nail I both roll the stamper from one side of my nail to the other, while simultaneously rolling my nail over the stamper. I can take a video of this if anyone wants to see- just ask in the comments  (I do this rolling thing with the Konad stamper. I use a different technique with the XL-Stamper which I will go over in the Stampers, XL Stamper section below)
  • Practice Practice Practice!!! Practice makes perfect they say.... Don't give up straight away if it doesn't work the first time. Also, with more practice you will get faster at the whole process, which tends to improve the quality of the stamping..... and of course saves you time. Other than a plain coat of polish, this is (for me) the quickest easiest nail art. 


Which Nail Polishes Can Be Used For Stamping?


To stamp with:


I think it's worthwhile to purchase some of the special Konad stamping polishes when your starting out (available through Konad here , on Ebay here. ). I would recommend at least getting the white and the black. Do stay away from the gold and silver - I don't own them personally, but have heard they aren't very good.

I find the pastels and the darker colours great. The pastels show up well over most backgrounds (they are very opaque) and the dark colours (ie dark blue, dark brown) look great over any background that isn't super dark.

The in-between colours such as red and orange don't work very well over anything but a very light background unfortunately.

The Konad special stamping polishes are designed especially for stamping (duh!), so they are very pigmented and show up easily over the background polish. They also take a long time to dry, so you don't have to work as fast when scraping and stamping. (much easier to find your feet when stamping for the first time!)

If you don't want to fork out the money for these polishes, don't worry as lots of normal polishes work just fine. If it's a polish that requires just one coat to look opaque on your nails it will most likely work. Many of the Sally Hansen Insta Dry and Xtreme Wear polishes stamp great and most of my China glaze polishes stamp very well too.

If you like the look of stamping with a metallic polishes, the China Glaze Romantique collection and Khrome collections stamp very well.  The Essie Mirror Metallics collection is also good, but I would stay away from these when first starting out as they dry particularly fast as your trying to stamp.

There is a rather long list here of polishes other than Konad that stamp well.

Top Coats that don't Smear


As mentioned in the tutorial, it is very easy to smear the stamped design when you add a top coat, and you definitely want to add a top coat or the design will start to flake away, especially after showering. Make sure that you wait at least a few minutes before adding a top coat.... the longer the better.

Then also make sure you use a generous amount of top coat and try to only go over each part of the nail only once, and very lightly. (If you miss a bit of your nail wait for the top coat to dry and then apply more).

Also, some top coats, no matter how carefully you apply them, will smear the design. Sally Hansen Mega Shine top coat is horrible for this! Sally Hansen Diamond Flash fast dry top works fine.

I always stick to Seche Vite and it works a charm so long as I apply thickly. Seche Vite is readily available on ebay. I have tried the Poshe top coat and not had a problem, I just prefer Seche. Also, Konad makes a special stamping top coat that a friend of mine swears by.

Essie 'Matte about you' smears stamping designs a lot. If you want a matte finish, apply your non-smearing shiny top coat, and after that dries use the matte top coat. To create a matte/shiny design, apply a coloured polish, then a matte top coat. You can then use a shiney clear polish to stamp like I did here 

With both the top coat and stamping polishes, if you don't want to go out and buy new products, have a play around with the polishes you already own to find out which will work.


Stampers


There are pros and cons to both of the stampers that I use. When starting out with nail stamping I would recommend the Konad stamper as it picks up the images from stamping plates a lot better and easily, and this is the most important thing to master with nail stamping.

Konad Double Sided Stamper


Konad Double Sided Stamp Set
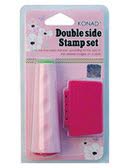
When I started nail stamping I purchased all of my equipment from Konad  (Australian distributor here). You will generally need to use a nail file to roughen the surface of the rubber stamp very slightly before you use it (File a little bit, try stamp.... and if you are still having issues picking up the image, file a little more). The Konad stamp is definitely the easiest stamper to use in the sense that it picks the images up well. It also makes the designs look the best - as it evenly picks up the polish with no gaps like the XL stamper (review below).

However, the application process with this stamper can be tricky. It is very firm, and therefore, due to the curvature of your nails, if using a full nail stamp, you will need to roll the stamper over your nail, one side to the other (you can’t just press it onto the middle). Roll is in bold because it's very important! I find that if my nails are longer, I have trouble getting the image on the outer edges of the tip of my nail as they sort of bend and the stamp doesn't press hard enough (if you are running into this issue I recommend trying the XL-Stamper- read below). Also, when using small full nail images (i.e. they only just fit on your nail, if you line them up perfectly) I have trouble trying to line up the image on the side of the nail. I usually end up with the image shifted to one side, so there will be a gap between my cuticle and the image on one side. To avoid this problem, if you are starting out with nail stamping stick to image plates that have larger images to avoid this problem (The Cheeky 2013 jumbo plates, Dashica Beauty big SDP plates, XL jumbo plates, DRK A, B C....etc. see the stamping plate section below for more info!).


XL- Stamper

XL Nail Art Stempel
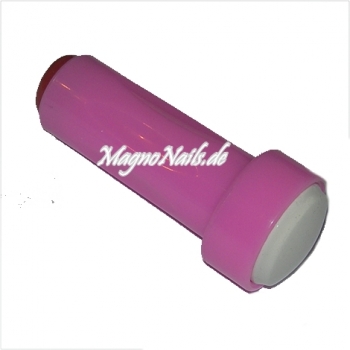
This stamper can be purchased from Magno Nails here however they seem to only be selling to Europe now. I am trying to get in contact with them but they are ignoring me.....so I'm looking to find a different but similar product (If anyone has suggestions?)

There are situations when I used this stamper, and other times when I need to use the Konad stamper.
This stamper is very different from the Konad stamper. It's very squishy. Therefore, it’s incredibly easy to cover the entire nail because it just contours around your nail. You can just line up the design and squish your nail right onto the stamp (see below). If the design doesn't require a particular orientation you can even just squish it directly onto your nail without rolling.

It's also good for smaller designs (like the Konad plate full images and gals plates). With these smaller full nail designs I have trouble lining up the design so it covers the whole nail when I use the Konad stamp as you need to roll the stamp from one side of your nail to the other. With the XL stamp you can just line up the image at the top of your nail and then squish it on like in the picture. The reason I don't always use this stamper, is that it seems to leave hollow bits in the image, so it just doesn't look as good as when you use the Konad stamper which always picks the image up perfectly for me (see image below). See the little hollow bits in the houses on the bottom left?


Also, with some image plates/designs, this stamper just won't pick the designs up at all! I think it is when the designs aren't etched deep enough into the plate (With most of the images on XL-A, XL-B and XL-D I have this issue). The Konad stamper is much better at picking up the designs from these plates.
And one last issue.... when you first get the XL-Stamper it is so smooth and shiny that it won't pick the images up and requires filing to roughen the surface. The first one that I bought, I over-filed (it was easy to do with this stamper) and always had small cracks or lines in the images I stamped. I had to buy a new one and with that I was much more careful and got it working..... It's a fine line between over-filing and being too smooth to pick up images. Make sure you use a very light file (non-coarse).


Nail Stamping Plates: Reviews and Where to Buy


Since I started nail stamping a few years ago, it's really taken off and there are new plates coming out every month from many different companies. These are the plates that I own, and my opinions on them. There are many many more out there that I haven't tried. I listed all the others that I don't own below with links to online stores that carry them.

Some stamping plates come as small circular disks, usually with 5 images per plate. Others come as large A5 plates with approximately 40-50 images per plate. I prefer the large A5 plates as they are easier to store, and choose between multiply designs at the same time. When you have more than a few of the smaller circle plates, storage become an issue, but you can purchase holders for them here or here which are similar to CD wallets.
If you are trying stamping out for the first time I would recommend the Cheeky Jumbo Plates  (2013 collection) as they are easy to get a hold of, cheap with free shipping and have large sized images for easy alignment on the nail.
I have heard that the bundle monster 2011 and 2012 collections are also very good, however as I only own the 2010 collection I can't personally vouch for them. I would avoid the 2010 collection as they full size images are very tiny.

There is 3 categories I guess for nail stamping designs:
  • Full nail designs - these have a design that covers the whole nail. Sometimes there can be issues with these not being large enough to cover your whole nail. I will mention this where applicable in my reviews. 
  • Small image designs (for lack of a better name) - These are usually small flowers, animals, abstract designs etc that can be used as an accent. 
  • Tip stamps- These are used to create a french manicure look - I'm not a fan so don't have an example I can show you! Sometimes the full nail designs will have an inward curve on one side so they can be used for french manicures. 


I think the XL plates (excluding XL-A, XL-B and XL-D) and the big SDP plates are better quality, however they are more expensive and you generally need to order a few things to make the shipping worthwhile - best to wait until your sure it's a hobby/look you enjoy.

Konad Stamping plates


It is my understanding that Konad is the original nail stamping company. Their stamping plates are very good quality, although a little pricey (Approx AU$8.00-9.00). This is for just one round plate with about 5 images. Compare this to the cheeky jumbo plates that have about 50 designs for $11.00 US.....

It's very easy to pick up a clean crisp image on the stamper using these plates, but the full nail images are just too small!!!! It's very hard to align them to your nail (for me they are exactly the width of my nails, and they thumb is too thin), and if you have long nails they will be too short.

However, I'm told they recently bought out a few new plates that have much larger image sizes M89-M97. They do also have an extensive range of non-full size images- ie flowers and fruit  by themselves, and of course you won't have the issue of them not fitting your nails.

I first learnt nail stamping using these plates and after only a few trials I could stamp the images very well, except for the full nail images as I couldn't line them up.

Link to stamping manicures with konad designs

XL-Stamping plates


These stamping plates seem to be available from lots of different places and as far as I know there are 26 plates (A-Z). They are A5 sized plates with approximately 42 images per plate.  Magno Nails carries the entire range for 16 EUR each however they seem to only be selling within Europe now =( . Cheeky seems to have the first 4 for $11.50 USD, and random ones are available on ebay (cheaper). In Australia, you can purchase A-T from Messy Mansion for $24.00 USD each. I have purchased the XL-O plate from ebay and it seems to be exactly the same quality as other I have purchased elsewhere (here's a link to the seller I purchased from)
There seems to be a differing quality between the plates and also sizes. I have found that some of the images on  XL-A, XL-B and XL-D are not etched deep enough, and I have trouble stamping with them (XL-D is a really unique plate though, so I continue trying to use it!). The others that I own (XL-C, XL-F, XL-N, XL-M, XL-O, and my friend has XL-L) are all really wonderful quality and fit my nails easily. As I said they are different sizes. The designs on XL-L, XL-M and XL-O are really huge. Some designs on these plates are actually too big, and a lot of the design is wasted (They need to be scaled down- ie still a large size to fit the nail, but the actual image could be smaller and more detailed).  I still highly recommend them though. The XL-N might be too short if you have really long nails, but I don't have any problems.
XL O
XL C

Here are links to pages containing images with the following labels: XL-A, XL-B, XL-C, XL-D, XL-F, XL-O, XL-N.

Big SDP Plates

Big SDP A
These are available at Dashica Beauty Shop for 14 EUR each and there are 29 different plates (A-Z, A2-C2). They are the large A5 sized plates, with 42 full nail images per plate.

I own Big SDP A, O, M, J, and I. They are all really detailed and the designs are etched deep enough that they are very easy to use. The image sizes are also large, so it's very easy to use the full nail designs, and they are scaled well to suit the nail (ie you get plenty of detail from the design on the nail).

If you buy multiple plates there are some designs that are similar to others on other plates, but no actual repeats. I feel like each image has been designed with care, and they haven't added a whole bunch of chunky un-detailed designs to beef up the plates.

These don't seem to be very well known, maybe as they are a little pricey and only available through one European website (as far as I know). Despite this, I highly recommend them.


Link to all manicures where I have used a Big SDP plate

Cheeky Jumbo Plates (2013 collection)

Viva Mexico
The Cheeky jumbo plates are available on Amazon for $11.99 US (free shipping in the US, but I payed about $5.00 to Australia), or from Cheeky's online store here for $11.00 US with free shipping worldwide (They are the ones with coloured checker backings. These are large A5 sized  plates with 35 full nail designs and 28 small designs.

I really love this collection of 10 plates, and they are in my opinion the best value for money plates I own. I own the Happy,  European Romance, Home Sweet home and Viva Mexico plates from this collection.

I have heard reports that some images are not etched deep enough, but it's not a problem I have come across, they all stamp beautifully for me.

Happy
There are some really beautiful designs on these plates, I especially love the uniqueness of the Viva Mexico plates (almost none of the images are similar to anything I have on other plates). Some images are really detailed, but some are a bit basic and chunky, perhaps they were trying to fill up space. But for the price I don't mind so much to pay to get the images that I do really like.

Something I especially enjoy about these plates is that there is both full nail images and small images (well for all but the happy plate which has only full nail designs). Many of the small images compliment the larger designs. I'm so keen to try a feature nail with the full design and then just have a smaller accent on the other nails. - I'm sure you will see this on my blog soon!


Link to all mani's I have done with the Cheeky jumbo plates


Bundle Monster Plates

There are now 5 collections available by Bundle monster: 2010, 20112012 and Holiday collections which cost between $17.99 and $21.99 USD. The shipping costs are here. It's $8.50 to most countries outside the US and Canada and free for standard shipping in the US. They are round plates with approximately 5 images per plate.

Also they now sell every plate individually as well as in the sets (as of October 2013).  The single image plates are going for $1.99US. I'm so happy about this as there are a few plates from the other collections that I have wanted for ages and couldn't justify buying the whole set for.

So as I said further up the page I only own the 2010 collection of bundle monster plates. The small designs in the 2010 collection are pretty cute, and there is whole plates dedicated to holidays such as Halloween and Christmas. They all stamp without any issues.

However, the full nail designs are tiny. They don't even fit on my pinky. I found a way to use them here though hoorah, by taping my nails. Because of this, I would avoid purchasing the original bundle monster 2010 collection......However!!!- they have just released a re-vamped 2010 plate collection and have re sized all of the full nail images! Hoorah.

This set also has tip designs which are little half moon shapes for french type manicures. To be honest, I'm not a fan of this type of design and If I'm going to do tip stamping I'll tape off my nail and use a full design anyway, rather than trying to line it up.

Now the 2011 and 2013 collections have a very good reputation, and they are priced decently. I'm sure I'll get them one day. They are apparently much larger, and therefore fit on your nail.

Link to my manicures with bundle monster plates


Gals Plates

So far there are 2 sets of Gals plates (they are made by Cheeky Beauty), the Fairy for $15.99 USD (which I own) and the Princess for $12.99 USD. Shipping is free worldwide.

The Fairy set is made up of more floral and exciting designs (in my opinion), and the Princess set has more geometric patterns. They are round plates with 4 full sized images per plate, and 2 small images.

I do really like the Gals Fairy plates, but the full size images which dominate the set are a bit too short when my nails are long (they are wide enough however unlike the original Konads). They are 1.6cm long, however they have a inward curve on one side for french manicures, so the real length is only 1.4cm. There is some really pretty designs in this set though, so I just have to use them when my nails are short, and use the small designs.

Most of the images stamp well, however I have had trouble with one of them (and as I haven't tried every design I'm sure that means there would be others).

Link to Gals Fairy plate manis

A Series Plates

These are available from Magno Nails and there are currently 60 round plates with 5 or more designs per plate available separately or in sets. (4.25EUR per round plate).

There are pretty unique designs in this series of stamping plates, and the 3 that I own have nice large full nail images and all stamp really easily and clearly. They don't seen to have a uniform size between the different plates that I own however....so I won't put the sizes here to avoid confusion.

Link to A Series Manis


Mo You London Plates

Updated December 2013 :)

I now own 13 of the MoYou London plates, which probably tells you a lot about how much I like them!

First of all the 'technical details'. They are 4.99 pounds each and shipping was reasonable to Australia (6 pounds for all 5 plates). There are a ridiculous number of plates available, and they seem to keep bringing more out every week! They are arranged into collections, everything from the oriental Suki collection, to the Biker collection and comic book collection. Here is the link to their website! I recommend browsing by collections, and make sure you don't miss any as some collections have 2 pages (the page 1, page 2 button is small!)
 
They have 3 sizes of images:
Original = 15mm/11.5mm   with 18 images per plate.
XL= 15mm/21mm    with 12 full nail images per plate.
XXL= 4.7cm/10.2cm  or  1.85inches/4inches
These XXL image plates have one very large picture made up of lots of different designs and patterns like the one shown below. I really like this idea! It seems like there is endless opportunities. (Note that they are not officially called XXL)


Ok....and here is the current list of my MoYou Stash!
I have:
Suki Collection Plates:  01  (XXL), 07 (XXL),
Pro
Collection Plates 12 (XL) 06 (XL), 01 (XL)  , 14 (XL), 10 (XL)
Kitty Collection Plates: 02 (small single flowers)

Explorer Collection Plates: 01 (XXL), 03 (Single floral designs but very large)
Biker Collection Plates: 06 (XL)
Mother Nature Collection Plates: 01 (XXL), 02 (XXL)
Sailor Collection Plates: 04 (Original size)


And the reveiw....
I have found that the images are picked up easily and almost all of them have stamped crisply. So far I haven't had a plate with any flaws in the etchings.  The designs are all really unique and many are beautifully detailed. Some of the designs have very fine detailing and you will need to be careful when stamping them as not to smudge and lose the smaller details. I recommend using the harder konad stamper for these and pressing lightly as you roll the stamper over your nail. If you make a mistake remember that 70-100% ethanol will remove wet nail polish while leaving the dried polish alone!

My only small gripe is that some of the images are actually a little too sparse- ie. there may be a flower and leafy design with 3 flowers total, but as the XL images are so large you only get one flower on your nail. I guess this actually works well in lots of situation when you don't want to cover the base colour up too much and make it too busy :). Oh and on some of the XXL plates there are beautiful patterns that are so small that they won't fit the nail - I guess they are there to make the plate look nice =(
Anyway- please don't let my tiny problems deter you from these plates as they really are beautiful and unique, and there are so many to choose from. I'm just trying to be thorough!  I have put in 3 orders in 2 months.....that says a lot I think!

Here is a link to all manis I have done with Mo You plates :)
 

If you have used any of these please feel free to leave your opinion of them in the comments section of this page :)

Here are some other stamping plates that I don't personally have experience with:


Also please let me know if there are any I have missed!

  • DRK  from ninja polish
  • Moyounails
  • MoYou London (A special thanks to Andrea for pointing these out! Omg- they look so unique and detailed!!)
  • Lesly Stamping plates     (These look absolutely beautiful but ordering is by email, they are $9.50 each for a round plate, and shipping is $18.00!! There is a minimum order of 10 pieces and a maximum of 20... Ugh! )
  • petlaplate. These designs look very fine and beautiful. Comment if you have tried them!

Size Comparison Between Full Nail Images on Different Stamping Plates

So I have mentioned the sizes of different full nail images in a couple of times in the above reviews. There is nothing more frustrating than purchasing some stamping plates, and then finding that they are too small for your nails when they arrive in the mail =(

I measured the full size images on all of the plates that I own and made a chart (The ones I personally measured are in black). I then did some research and added some other sizes from plates I don't own. The references are below the chart.

Hopefully this chart will help anyone with large nails, be they long or wide,  find big enough stamping plates!

Please note that the diagrams are not perfectly to scale. Read the measurements!

Here is some conversions to inches :)

10mm= 0.39 inches    12mm= 0.47 inches        14mm= 0.55 inches       16mm= 0.63 inches
18mm= 0.71 inches    20mm= 0.79 inches        22mm= 0.87 inches


Bundle Monster 2011, Red angel, DRK A: Ninja PolishLea Lac: Lacquer or Leave Her (I had to measure the plates on the screen and compare to the konad in the same image. Its probably not 100 exact due to the angle the picture was taken on so that's why I put the 'approximate' symbol')Pueen: Amazon Reviewer Mash 2012: Oooh Shinies
Salon Express: No Nude Nails
Winstonia: No Nude Nails
Bundle monster 2013: Katsy Nail Crazy  (The 0.5 is because she said it was the same as 2011 collection and I had a different measurement from her. May be an inches to mm conversion issue?)
MoYou London sizes are under their review above for now!


Hope this helps someone!


Like this page? Save it for later