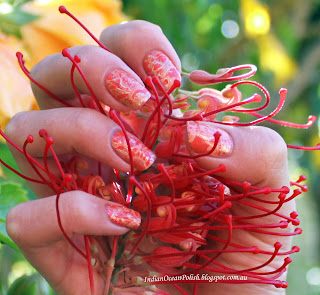
Saturday, 25 May 2013

Simple Watercolour Flower Nail Art


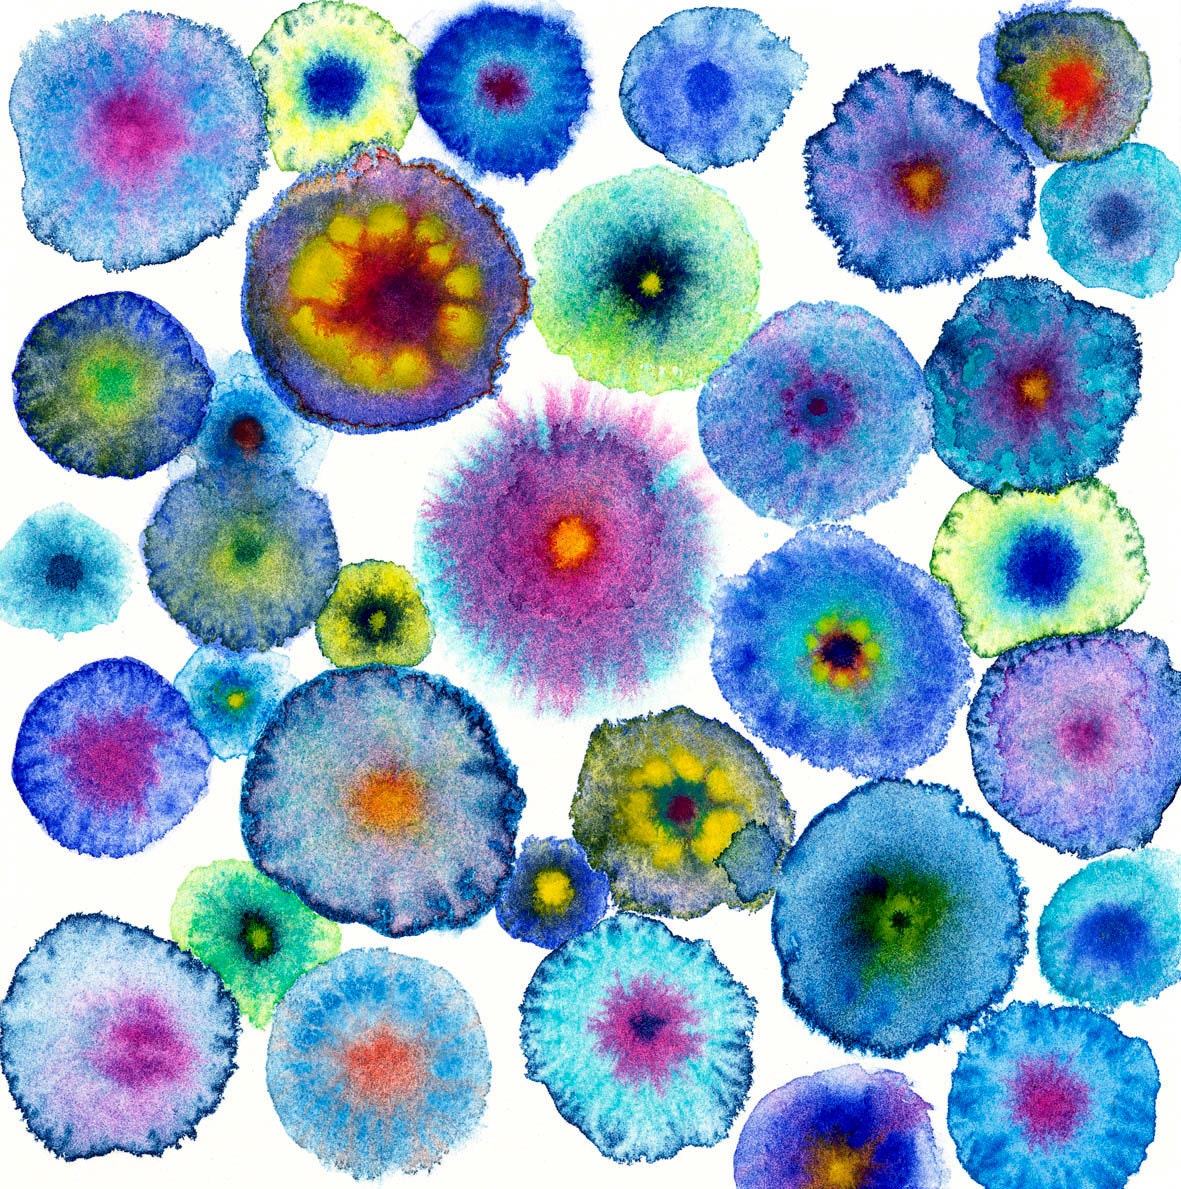
http://www.etsy.com/listing/83803587/large-circles-blue-abstract-canvas-print?ref=correlated_featuredI've been seeing a lot of pretty floral nail art on reddit lately (probably as it's Spring in the northern hemisphere) and wanted to give it a try myself. As it was my first time free-handing flowers I looked far and wide for a uncomplicated floral print/painting to inspire me.  I found this beautiful watercolour floral painting that looked adaptable to nail art on Etsy by Ilse Bernthal called "Blooms 7 blue". Pretty huh? Clicking the image should take you to the store.

To get a water colour look I first spotted the polishes I wanted onto a plastic dish, and filled a little dappen dish with pure acetone. I then dipped a small paint brush in the acetone (natural hair as synthetic brushes can be dissolved by acetone), then into the polish and swirled the brush on the dish to get a 'watery' consistency (adding more polish or acetone depending on if I needed more pigment or to dilute respectively). I then painted  swirly, circle-ish shapes that kind of look like flowers. Most of the flowers have 2 different polish colours (the second was used minimally around the outside of the circle/flower) and then an orange dot in the middle. I'm incredibly happy with how it turned out- I cant stop looking at my nails...I do wish I used a pastel blue as the background though.

The polishes used were:
Background: OPI Alpine Snow
Flower colours:-
Magenta: Sally Hansen Xtreme wear "Brick Wall"
Purple: Sally Hansen Xtreme wear "Purple Potion"
Dark Blue: Sally Hansen Xtreme wear "Blue it"
Periwinkle blue: Sally Hansen Xtreme wear "Pacific Blue"
Turquoise: Sally Hansen Xtreme wear "The Real Teal"
Orange: Sally Hansen Xtreme wear "Sun Kissed"


These will hopefully be the last cell phone pictures I use! I ordered a proper camera today- hoorah!! This next picture is especially blurry, but the sun was going down and its the best picture I got of the right hand =(


I took another picture with better lighting a few days later :)


Thanks for stopping by :)

Thursday, 23 May 2013

How To Make Your Own Nail Decals Tutorial

Tonight I tried a new technique I recently came across on nailnerd.com and then also on messymansion.com.au and beaching nails. - How to create your own nail decals!
This is where you pre-prepare a design for your nails on a plastic sheet or baking/wax paper, and then transfer it to your nails.

There's so many pros about this technique I'll have to make a list!
  • I find it much easier painting onto a sandwich bag or baking paper than it is painting onto my nails...
  • Probably because you don't have to paint with your non-dominant hand!
  • If you make a mistake/don't like the colour you used/decide on something better- its ok! - just try again.... you don't have to remove all your polish and start from the beginning.
  • Can pre-paint/prepare nail art for use when you don't have much time.
  • I've actually never used a nail decal.... but these seem to work well, being made completely of nail polish, as they kind of dissolve onto your nails when you add top coat.

This technique is also awesome for stamping nail art (I used it for this).
Pros:
  • All of the above...
  • You can colour in the stamping designs!!!! I'd always wanted to do this but colouring them in  on the nail just covers the lines up unless your a super-human. (see the tutorial to see how this works.... when you flip the decal over even if you make a huge colouring-in fail mess it turns out perfect on the other side!)
  • You can cut out a specific part of a stamp design if you don't want to use the whole thing. Yes you can also do this by quickly removing parts of the design on the stamper with acetone on a q-tip, but I'm never fast enough and the polish dries. 
  • If you are using a stamp design that needs to be centered on the nail, or in a specific spot on the nail (ie so all the nails are the same) this technique makes it easy :) 
  • This also applies for non full nail stamps, where you want the design to be on the same place of each nail.

The only disadvantage I found was that sometimes the design won't sit flat and requires extra top coat meaning it can be a little thick.

Anyway, here is the tutorial I made for making your own stamping nail decal. You would do the same for hand painted designs minus the stamping (obviously :P  ):


Since making this tutorial I have also tried using baking paper instead of a sandwich bag. The decals slide off the wax paper much easier than they did off the plastic so if you are having trouble removing your decals from the plastic try baking paper instead. The only downside is that they actually slide off too easily.... and if part of the decal is still drying (ie a part you have coloured in) the wet part sticks to the wax paper and the rest detaches, ruining the decal.
I have also experimented with stamping directly onto the plastic/baking paper, and then adding the top coat over the top (thinking this would mean I didn't have to line up the stamp over my clear polish), but it smeared really easily. I think that without body warmth it takes much longer to dry completely, or just gets smeared easily without a base... not sure why, but working over a pre-painted clear base seems to be the best way to go for me.

Something I have found to hep in the application to your nail is to wait for your top coat to partially dry and become tacky (only 20 seconds approx with seche vite) before applying the decal. This way it will stick rather than slide around :)


As I said above you can pre-prepare these decals for later use. Here are some I have stockpiled:


And here are some more pictures of my home made feather nail decal mani!
The polishes used in the sponge gradient are
  • China Glaze Sunset Sail (lightest)
  • Revitanail Barely There (Middle shade nude)
  • Sally Hansen Xtreme Wear Mocha Mix (reddy purply browny colour)
The feathers are stamped from GA38 (gals fairy series) with konad dark brown special polish
The feathers were painted with Mocha Mix and Barely There. 


Update!!!
I noticed I'm getting a lot of traffic to this page, so clearly people are interested in this technique!... So I thought I'd post other manis I have done using home made decals :)

For this manicure, the ring finger feature nail was done with a decal. I tried stamping directly onto the nail a few times but couldn't get it centered (which I can't stand!). So I stamped it onto plastic (over seche) and then applied it exactly where I wanted it :) 
More pictures and details on polishes used here


Once again.... tried about 3 times to stamp that darn Eiffel Tower in the centre of the nail, failed, ruined the base colours with polish remover .....and then made a decal. Much easier!
More details on this manicure and a picture of it in front of the Eiffel Tower can be found here. 


For these butterflies I used a paper punch on the decals. Tutorial and more info here


And here is the pièce de résistance! Floral decals make using MoYou London pro plate 06. More details here. These are by far my best decals that I have made so far!

These were made with MoYou explorer plate 03 whuch has great designs for this technique! See the full post here .


Thanks for stopping by!!!
Sunday, 19 May 2013

Water Sparbling Part Two: A Walk Though The Garden

I managed to keep my last mani for one and a half days before giving into temptation and trying another water sparbling (water spotted crossed with water marbling nails) manicure. This is definitely one of my favourite manicures I've ever done!
 There was an abundance of pretty flowers in the backyard, and lots of them happened to match this manicure so I was inspired to get lots of pictures with them :) My boyfriend even helped out and used his fancy camera!! Amazing how much better the pictures are compared to iphone pictures (which I usually use). Unfortunately I don't think I could hold up the monster camera with one hand to take pictures by myself and I think taking macro shots might require some photography expertise.

Details:
The background polish is OPI Are We There Yet?
The marbled orange is China glaze Peachy Keen
The Marbled Gold is Sally Hansen Xtreme Wear Golden-i


My boyfriend kindly took this on his fancy camera. Much better than my iphone pictures! The flower is a banksia


I thought I should do a non-flower picture for close up purposes.


A pretty hibiscus

More of that Banksia- This is the other hand (Left). This is the first manicure I've ever done where I like the right hand better!

I haven't the foggiest idea what this flower thing is. My boyfriend found it when he was out walking. It's a little creepy looking!

Saturday, 18 May 2013

A Fail/Mixture of Water Spotting and Water Marbling

Water Sparbling

On Thursday night I was playing around with the water spotted and water marbling techniques for the first time and I had an idea! What if I water marbled 2+ colours, and then spotted/sprayed that? I'm sure I'm not the first person to do this, although I couldn't find any tutorials from a quick google search.
Anyway I'm very happy with how it turned out. When you spray polish that has been water marbled (when its still floating in the water) the colours separate out, and depending on the polish used you also get some spots. With the colours I chose I thought it looked exactly like a rock I had when I was younger (Yes before Ipads and video games we played with rocks!... or am I just strange?).
Unfortunately, much to my dismay, my mum threw my rock collection out, but luckily my Grandfather still had some specimens from his days traveling Australia as a civil engineer.
With a quick search through them I found the one I was looking for which is apparently called tigers iron, a banded iron formation of jasper, hematite and tigers eye unique to Western Australia. Here is a picture of my grandfathers iron core (from a mining drill thing) and some fossilized wood that also looked similar because its from the same area. The other image is from a google search and shows some tiger iron with lots of tigers eye in it which looks even more similar (Doesn't seem to be any tigers eye in the core sample)

Left: Half a core of iron ore from Marandoo mine near Mt Bruce and mt Tom Price. Right: Fossilized wood from Mt Newman.
Proper Tiger iron
And now for the nails:
The background is Misa Office Politics. I really love this colour but its really hard to match with anything. Its like a really dusty dark blue/grey. The marbling is done with Sally Hansen Xtreme wear Mocha Mix, and Sally hansen Xtreme wear Golden-i (A foil look gold polish).
At first I really didn't like this colour combo..... but its grown on me heaps. The marbling / spotting is just so interesting to look at!

Left Hand. I love how both my pinkies turned out

Left hand w thumb

Left hand- showing the pointer finger a little better... another one of my favorites

Right hand. The gold on the middle finger looks like a smiling skull from this angle in my opinion. From another angle it looks like a bear face missing one ear...It's kind of like finding shapes in the clouds.

 Ok, I tried to make a tutorial... However unfortunately I didn't bring the colours I used previously away with me for the weekend (we are having a weekend in Margaret River). I did my best with the polish I brought with me, but it wasn't quite as good. Also I didn't really go through how to water marble as I figure there is a bazillion other tutorials on that far far better than anything I could manage. It was my second attempt at marbling, so I didn't do a very good job.... but you can see how when you spray with the perfume, the different colours separate from each other and get some water spots.

Some notes: I used filtered water or rain water (Tried both and both worked fine) at about 20 degrees Celsius (68 degrees Fahrenheit). 

Also I changed the water every 2 nails as there was a build up of the perfume oil that was causing differences in the water spotting.

I used Britney Spears Curious perfume. I also tried 100% ethanol but this only created bubbles. I think the bottle I had it in created too fine of a mist which didn't penetrate the layer of polish. I put the 100% ethanol in a different bottle and had a little more success but I much preferred the look the perfume created. I do plan to try different ethanol concentrations in water to see if that makes a difference.

Update: I used Priceline Cosmetic Brush Cleaner to do this water sparble and it seemed to work pretty well. 

*I used perfume as I didn't have hand sanitizer and the 100% ethanol I had didn't work. In the future I might try diluting the ethanol to 70% and seeing how that goes (would be much cheaper).


Bloopers.... I originally used polystyrene cups. Apparently nail polish eats through polystyrene because when a drop of polish sunk to the bottom of the cup a few minutes later I had a flood to deal with!


Friday, 17 May 2013

How to use too small stamping designs!

This mani was from earlier this week and was my first time for 2 things! Firstly I have never done a proper striping tape mani before (Only a basic scotch tape). Secondly, I got to use one of the tiny tiny stamping images from the original (2010) bundle monster set- specifically BM19. I have had the set for over a year and never used any of the full nail images.... becuase they won't even fit my pinkie =(
I originally chose this set over the 2011 set (unknowing of the size differences) because I had to have this leaf design so I was super happy with this mani!
To do this I first painted my nails with China Glaze for Audrey (I seem to use this in every second manicure I do!) and went to bed - I tried to start the mani before I went to bed, but it wasn't dry enough and the polish was ripped up when I removed the scotch tape. Although... I wasn't happy with one nail in the morning and had to repaint it, and it dried enough in about half an hour to redo- this was with seche vite to dry it faster, and I also stuck the scotch tape to the back of my hand before using it on my nails to make it less sticky.
After the base colour was dry, I used scotch tape/sticky tape to cover up the areas I didn't want stamped with the leaves. I then stamped using konad red, and removed the tape to reveal a square/triangle of red stamped leaves. After this I used striping tape to tape around the leaves and to make stripes and painted the divided areas with China Glaze shower together, and OPI fly. I removed the Striping tape with the polishes were still wet, and painted over with Seche Vite.


Striping tape and stamping mani_Bundle monster_BM19


Matte Attack!

 About a week ago my Essie - Matte about you arrived in the mail- Hoorah! I immediately proceeded to try stamping over the matte polish to create a matte/shiny look. I chose a stamping design that wasn't too intricate with approximately even stamped/unstamped proportions, and stamped with Sally hansen diamond strength treatment base coat. I tried Seche Vite and Sally Hansen Mega shine, but they both seemed to dry to fast and therefore not stick all over the nail leaving flakey bits. I know lots of people have used a black polish to do this look which looks awesome and apparently works great, but I hate hate hate trying to clean up black polish off my cuticles and skin!
The second image was from 5 days later when I was getting bored of the manicure and had a mothers day thing that I was wearing a hot pink dress to (the background of the picture)- so I had to make my nails match. I got the "loveheart flowers" growing up from striping tape idea from a mani I saw on Pshiiit.com. This was a very quick and easy way to either dress up an old mani, or re-jig a mani to match an outfit if short of time!

OPI black onyx coated with Essie Matte about you and stamped with Sally Hansen diamond strength treatment (silver bottle). The image is from XL-N stamping plate from Magno nails.
Heart flowers from konad stamp plate M83. The striping tape and rhinestones are from ebay.

Thursday, 16 May 2013

Gals fairy plates

 So I recently purchased the Gals Fairy stamping plates and so far I have used them 5 times. The images are etched well and are easy to pick up on both the Konad stamp and also XL stamp (This stamp is squishy and sometimes doesn't pick images up well ). My Only gripe is that if you have long nails they are too small - hence the feature/accent nail look below.
I have been in love with stamping a small abstract design/flower etc in the lower corner of my nails lately (I was originally inspired by chitchatnails). I think its especially great when doing a black and white manicure... for some reason using a whole nail design stamp on white is too busy for me- but I have seen plenty of pictures of other peoples nails that look great!

Essie a Crewed Interest stamped with Essie no place like chrome.The design is from gals stamping plate GA36.


OPI- You're such a Budapest Stamped with Essie- No place like chrome (Design from Gals Fairy plate GA35)

Opi - Casino Royale stamped with Essie Penny Talk with a design from a Gals fairy nail stamping plate GA35

Scotch tape mani for an Under the Sea party. OPI: Fly background stamped with China Glaze for Audrey and Konad special polish in dark blue. Image from Gals GA30. Glitter polish is home made
Gals fairy nail stamping plates GA34. Opi Alpine snow, konad special polish black

Wednesday, 15 May 2013

A collection of my past nail art!


So here goes... my first post. I decided to dump a pile of my older pictures to give this blog some body. As you can see I absolutely love nail stamping! I have a rather large stack of stamping plates including lots from konad, Magno nails, Dashica Beauty Shop (Big sdp plates), some from Bundle Monster and Gals (Which I think is part of Cheeky). I also really enjoy trying new techniques, I'm currently dying to try a water spotted manicure!
 I apologise as some of the pictures are quite grainy or slightly blurred - when I took them I never imagined I'd one day be posting them on a blog (I'm also cringing at my sad cuticles in some of these pictures! I actually only recently started using cuticle oil regularly)


Essie Jazz stamped with Sally Hansen Insta Dry in Sonic Boom. Design is from Big-SdP-A. The picture is taken from Bunker Bay, Naturaliste, Western Australia.


This took forever. I used a sally hansen salon manicure polish called Jaded and it was very thick but un-pigmented.... meaning it took years to dry and every time I did something I kept smooshing it. I was on weekend holiday and it was the only colour I brought with me (BIG mistake haha).  Once dried (the next morning) I stamped with Essie Penny Talk (Image from A53).


OPI Black Onyx stamped with China Glaze Devotion (And vice versa on the ring finger but with Konad special back).  Design from Big Sdp-O
OPI Berlin there done that stamped with Sally Hansen Xtreme Wear White on. I then used a dotting tool to add the different colored spots. There is China Glaze for Audrey, China Glaze Peachy Keen and A Revlon polish Ill have to look up. Stamp is from Big SDP A


The gradient is made up of OPI Dulce De Leche, Sally hansen xtreme wear grey area (more of a taupe than grey) and Sally Hansen Xtreme wear Flirt. A design from XL-C is stamped over the top in Essie- Penny Talk


This is actually one of my first attempts at nail art from about a year and a half ago! The flower is from magno nails XL-E and is stamped with konad red. The black rhinestone is a cheapy of ebay.
Opi Thanks a windmillion, OPI fly (I think) and OPI dating a royal stamped with China Glaze Passion with a design from XL-B. Wish I had a less blurry picture of this one =(

Ill have to do a big search through my polish stash to get the names of all the polishes for this one.It was done by painting the nails white, then using a dotting tool and going nuts with lots of colours.

China Glaze peachy keen and OPI Elephantastic Pink. Used scotch tape and a striping brush to create the diagonal division. Stamp is from big sdp-I.

Opi A-Taupe The Space Needle stamped with China Glaze Delight. The dots are CG for Audrey and OPI Thanks a Windmillion. Design from big sdP-I

Opi ski teal we drop stamped with China Glaze for Audrey. The stamp was Plate A48. Amazing what some natural light can do for my photography skills!

This one is Opi Black Onyx, stamped with both Essie penny talk and China Glaze Magical- unfortunately my cell phone picture didn't really pick up the shifting colours. The design is from XL-N (from magno nails)
The marbling effect was done by spotting different colours onto white and swirling the wet polish with an acetone soaked paintbrush. The nail stamp is from magno nails :XL-N. 
Claw hand! I noticed this knocking about on the Nails Magazine Pinterest "Best of  Nail Art Gallery" along with a few others. I was kind of flattered, but also sad- they didn't have my blog watermark so it's kind of anonymous =(
Oh well lesson learnt. For this I used OPI Stranger tides (I think) and stamped with a gold stamping polish from magno nails and konad dark brown. Both of the images are from XL-D :)

This gradient was made using OPI skull and glossbones, China Glaze For Audrey and OPI Fly. The glitter is a homemade polish.
This one is soooo long ago I cant remember what polishes I used sorry. I do know however that the glitter is Sally Hansen Xtreme wear Disco Ball.

This one is OPI road house blues stamped with a design from XL-A with konad special white.