Hi Everyone,
I hope your well.
You may have noticed that I haven't posted in over two weeks (oh no!!). I apologise sincerely for that, there are many reasons-
1. Started reading A Song of Ice and Fire (and finished all the completed books so far!)
2. Went back to university for the year
3. My hands are a mess!! My chefs knife was carelessly put in the washing up basin by someone (whom I'm sure thought they were being very helpful) where it got multiple chips in the blade! I had to spend an hour working on it with my whetstone to get them out (to my immense satisfaction). Being a novice I also managed to file the sides of my thumbs in the process and didn't notice until they were bleeding and so they have been looking pretty manky! In addition to my un-photogenic thumbs I also managed to slice my pointer finger as the blade is now so sharp! . Oh and I made a curry with tumeric which apparently stains everything including your skin and nails bright yellow!
I have tried to spare you the worst of my yucky hands, but they are still not 100% so I apologise for that too!
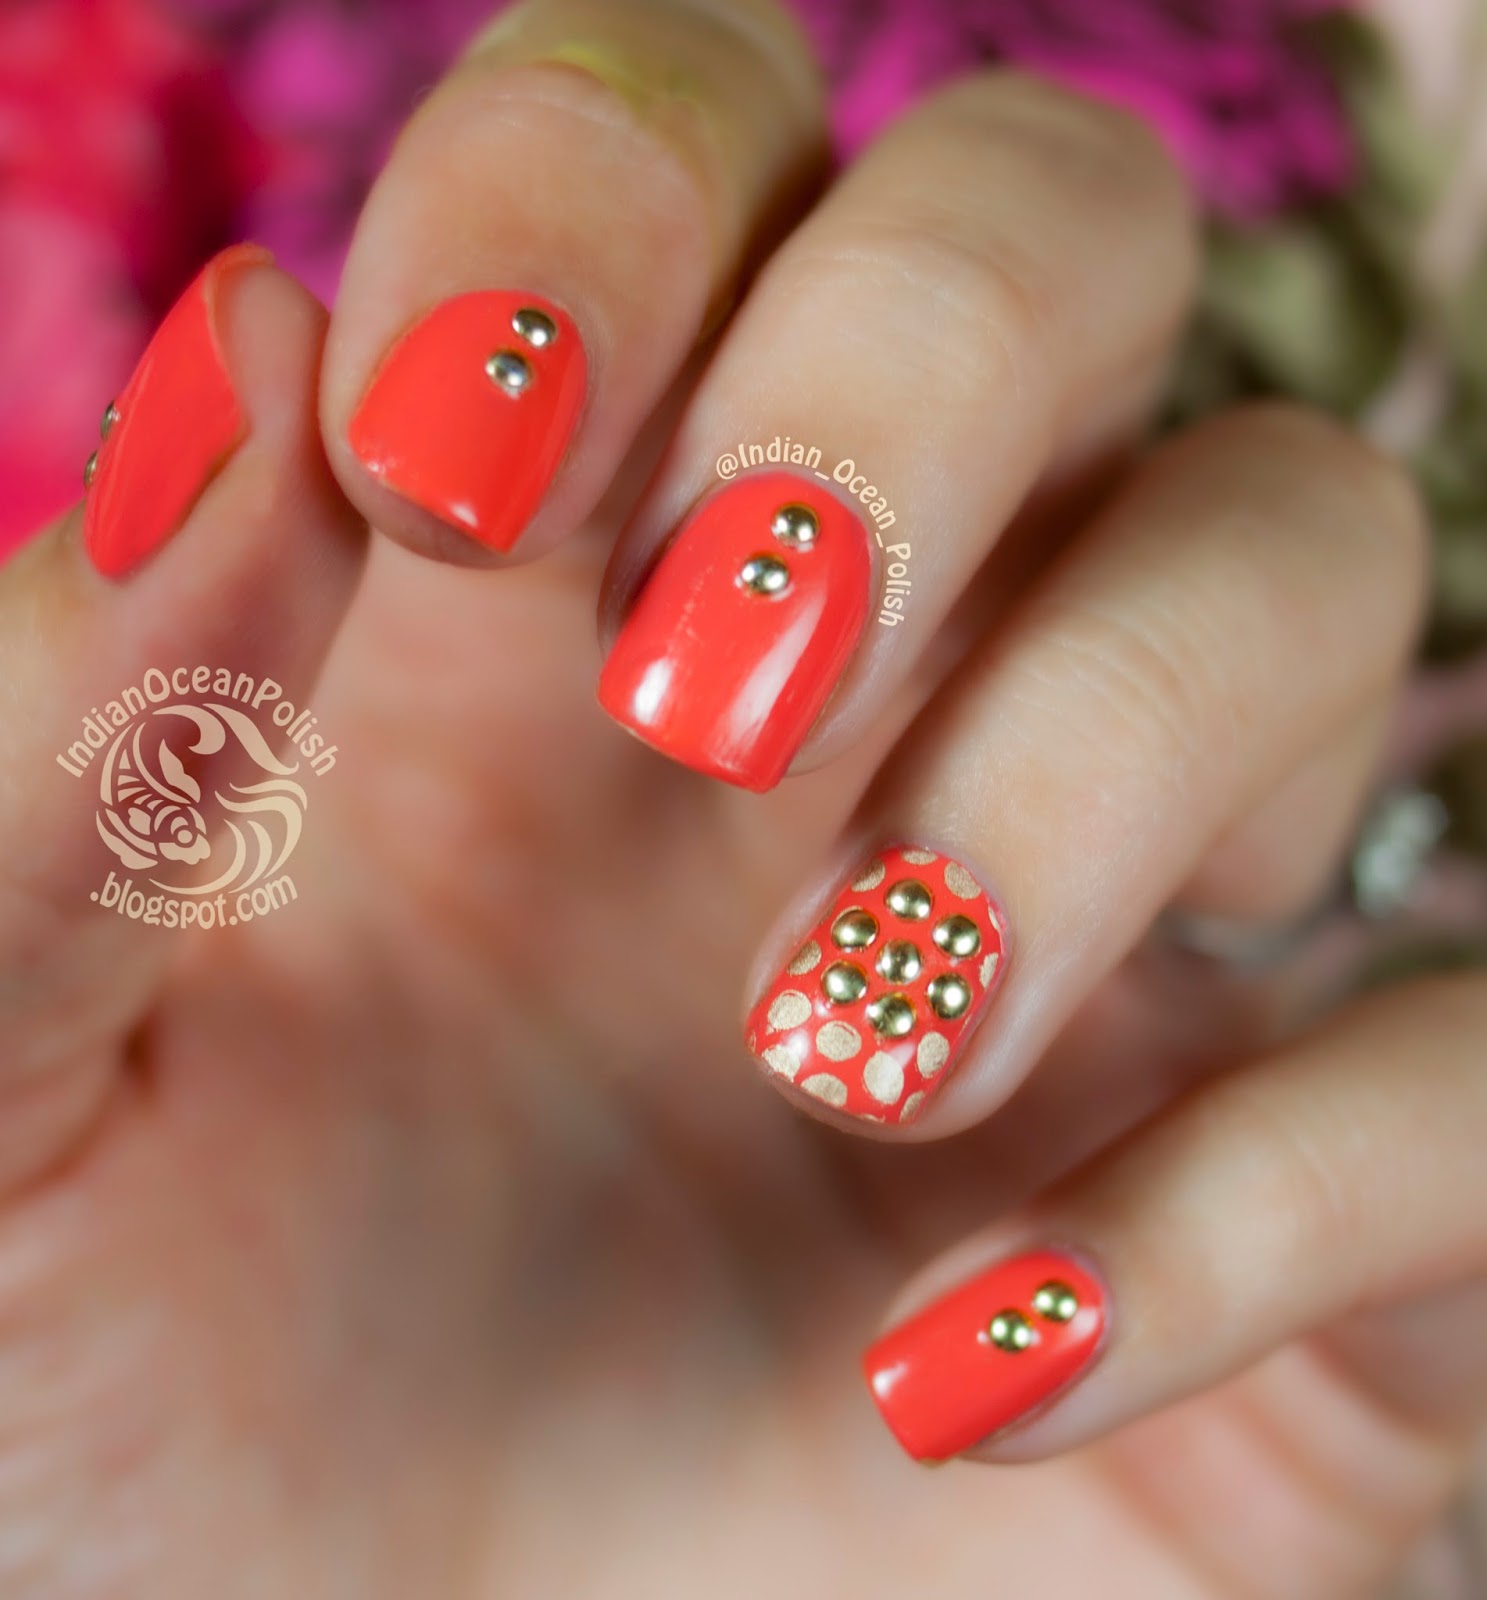
Anyway, onto the nail art. I'm very happy with this simple design I came up with using small circular studs. Originally I was going to cover the whole ring finger nail in studs, using the dotted stamp as a template but I ended up just doing a flower which I like much more than the original plan! The gold studs were just purchased from ebay for about 1-2$.
The stunning orange polish I used is OPI 'Hot and Spicy. I can't decide if it is orange or peach, bright or almost even pastel! I love it!
The gold polish used to stamp the dot design from MoYou London pro plate 01 is Essie Good as gold.
What do you think of these? I definitely want to revisit the studded designs over dots look. Maybe as stripes or random studs next time.
Showing posts with label stamping. Show all posts
Monday, 3 February 2014
Sunday, 5 January 2014
MoYou Pro 14, 12 and Kitty 02 Mix and Match Stamping
Hi Everyone,
I hope you have been well.
I'm back from holiday which is slightly depressing but I've missed my blog, Fiance and puppy dog (in no particular order)!
I can't seem to stop myself from using my MoYou stamping plates....I hope I'm not being too boring. I think I need to push myself to do some hand painted designs...I always enjoy it, but it's just so easy to quickly stamp something!
For these nails I used 5 different stamp designs which were a little bit similar- all floral and finely detailed.
Pinky to thumb the designs are from Kitty 02, Pro 14, Pro 12, Kitty 02 and Pro 12. Sorry that you can't really see the thumb- I didn't get any good pictures and they are chipped now!
For the ring finger I used the reverse stamping technique on my left hand (tutorial here) so that the design was mirrored.
The polishes I used were:
Picture polish sky- which I have swatched below- it is the most perfect baby blue with the slightest hint of mint. The formula was very impressive too. Probably the best Picture Polish I have used so far. Has anyone else used Picture Polishes before? What do you think of them? I think they have the most perfect colours but for the non glitters, I've found the formula of some a little gluggy (Coral reef and honey dew were like this). All in all though I will continue to buy them as they have such stunning colours and most have a good forumla :)
For the stanping I used a konad polish - Its just called dark brown, and it seems to have a hint of burgundy.
I hope you have been well.
I'm back from holiday which is slightly depressing but I've missed my blog, Fiance and puppy dog (in no particular order)!
I can't seem to stop myself from using my MoYou stamping plates....I hope I'm not being too boring. I think I need to push myself to do some hand painted designs...I always enjoy it, but it's just so easy to quickly stamp something!
For these nails I used 5 different stamp designs which were a little bit similar- all floral and finely detailed.
Pinky to thumb the designs are from Kitty 02, Pro 14, Pro 12, Kitty 02 and Pro 12. Sorry that you can't really see the thumb- I didn't get any good pictures and they are chipped now!
For the ring finger I used the reverse stamping technique on my left hand (tutorial here) so that the design was mirrored.
The polishes I used were:
Picture polish sky- which I have swatched below- it is the most perfect baby blue with the slightest hint of mint. The formula was very impressive too. Probably the best Picture Polish I have used so far. Has anyone else used Picture Polishes before? What do you think of them? I think they have the most perfect colours but for the non glitters, I've found the formula of some a little gluggy (Coral reef and honey dew were like this). All in all though I will continue to buy them as they have such stunning colours and most have a good forumla :)
For the stanping I used a konad polish - Its just called dark brown, and it seems to have a hint of burgundy.
Thanks for stopping by :)
Labels:
floral,
mo you london,
stamping
Saturday, 28 December 2013
Indian Ocean Holiday Nails!
Hey friends!
Sorry that I haven't posted in over a week-Christmas stress got the better of me! But don't worry, I'm all relaxed now at Rottnest island with my best friend and parents :) I have some nail art to share with you. I made a new nail polish for my friends Christmas present so we are both wearing it. It's a black polish with holographic particles and colour shifting glitters and some purple glitter. This iPhone picture is pretty awful unfortunately so I'll have to make another bottle for myself when I get home and take proper pictures.
The feature nail is the blue polish I made recently called midnight snow... Applied over Sally Hansen pacific blue. The stamp is from the mo you sailor collection- 04 (it's one of the plates with small images).
And here is a picture of me and the most giant crayfish I have ever seen! One of my Dads friends caught heaps of them and donated it!
Anyway I hope everyone had a wonderful Christmas!
I'll be home in a few days and the more regular posts will resume :)
Wednesday, 18 December 2013
Red and White Nail art with MoYou Mother Nature 02
Hi Everyone :)
I have so many MoYou London plates now and they are all so beautiful.....so I apologise for the constant spamming of stamping manicures! I absolutely love birds, so I wanted to use the Mother Nature 02 plate again, and try out more parts of the plate than my last mani using it (here).
6 months ago when I was in France my beloved Weiro Larry flew away from my Grandparents who were looking after him. I've been avoiding bird manicures for a long time until very recently because they made me so sad. Here is a picture of him :) He used to put his head down like that because he was addicted to head scratches! I could completely cover him with my hands and he wouldn't ever squirm! He was very smart too- he could say his name, What cha doing Larry?, Hello Larry and sing lots of songs like the Kill Bill Whistle and before I left I was teaching him to bop up and down when I said "Dance Larry".
For this manicure I used OPI Big red apple, OPI Alpine snow and the Konad Stamping polishes in red, and white.
I have so many MoYou London plates now and they are all so beautiful.....so I apologise for the constant spamming of stamping manicures! I absolutely love birds, so I wanted to use the Mother Nature 02 plate again, and try out more parts of the plate than my last mani using it (here).
6 months ago when I was in France my beloved Weiro Larry flew away from my Grandparents who were looking after him. I've been avoiding bird manicures for a long time until very recently because they made me so sad. Here is a picture of him :) He used to put his head down like that because he was addicted to head scratches! I could completely cover him with my hands and he wouldn't ever squirm! He was very smart too- he could say his name, What cha doing Larry?, Hello Larry and sing lots of songs like the Kill Bill Whistle and before I left I was teaching him to bop up and down when I said "Dance Larry".
Anyway, I'm making myself sad but I wanted to share something about him with you all =(
For this manicure I used OPI Big red apple, OPI Alpine snow and the Konad Stamping polishes in red, and white.
Thanks for stopping by:)
Labels:
mo you london,
stamping
Monday, 16 December 2013
Purple Marbled Gradient with MoYou Suki 07 Stamped Swirls
Hi Everyone!
I hope your weeks are all off to good starts. Today I have a marbled gradient to share with you that I am quite fond of. I am huge fan of purple polishes and I have wanted to do a purple gradient for some time. I decided to do a marbled gradient instead of a sponged gradient and I'm so glad I did!
My tutorial for this marbled gradient can be found here....and it is a lot easier than you might assume! Has anyone ever tried out this alternate style of gradient? Which do you prefer (marbled or sponged)?
With the purples I think this manicure looks magical!
The Polishes used in order from light to dark were:
OPI: You're such a Budapest
OPI: Do you Lilac it?
China Glaze: Grape pop
OPI: Vant to bite my neck?
In order to enter this manicure into the MoYou December Pinterest contest I decided to stamp over it in Essie No Place like Chrome with a stamp from MoYou London's Suki Collection plate 07. I actually prefer the unstamped version where all the marbling of colours is easier to see...but oh well I still love them. Which do you like?
If you would like to vote for this manicure in the contest please like and repin here.
There are lots of other amazing manicures to look at too!
If you would like to vote for this manicure in the contest please like and repin here.
There are lots of other amazing manicures to look at too!
Thanks so much for stopping by :)
Have a great week!
Chanfie
xx
Saturday, 14 December 2013
Stained Glass Homemade Nail Decals With MoYou London Explorer Collection Plate 03
Hi Everyone :)
I'm incredibly happy right now for so many reasons!
-I'm on a weekend trip in the Margaret River wine region.
-We just found a lovely family to rent our house that I have worked so hard to clean and garden the last few weeks.
-My friend and I just got nail mail from MoYou London!!!
-I have used a plate that I had been frothing over for a month!!!
-I love my nails right now!
Now in the interest of eating food and tasting delicious wine this will be a quick post! I have only 2 pictures of this mani currently as I had to take them down here (we are south of home, so I keep saying down) without my usual set up and I don't even have a mouse on the laptop!
So I didn't plan them as stained glass. I just painted my nails with a new polish of mine- Picture Polish Citrus and decided these colours might go well together. The other polishes are:
-Turquoise: Sally Hansen Xtreme wear in The Real Teal
-Lime Green: Essie the more the merrier
-Yellow: China Glaze Lemon Fizz
-Stamped Dark Blue: Konad stamping polish in dark blue.
I made the decals using this technique.

I will have to post a few more photos when I get home as I really like these!
Thanks very much for visiting and have a great weekend!!!
Wednesday, 11 December 2013
Christmas 2013 Nail Art Ideas: Simple and Not So Simple!
I must be the only nail art blogger whom has made it to half way through December without posting Christmas nail art. There is a reason for that.... I have been saving up all my Christmas manis for a big Christmas Nail Art extravaganza!
First up I have a stamping manicure done with a Mo You London plate: Suki 07. I didn't buy any Christmas stamping plates (which I'm now regretting) but I think this design is quite Christmasy in the right colours. To centre the design on the red nails I actually made stamping decals using this tutorial and placed them in the exact centre of my nails. The red metalic polish is Revitanail "Ruby Rich", the white on my ring finger is OPI alpine snow and the white use for stamping is the white konad stamping polish.
I really really enjoyed wearing this mani :) If you also like it please vote for me in the MoYou competition by liking and repinning this image on their board here.
I hate asking for votes, but some of the big nail art blogs have done the same and seeing as they have thousands of followers are smashing it!
The next is the most simple Christmas nails I have to show you. Just a plain white with golden accent nail. The white polish is Essie Marshmellow which is much like OPI Funny Bunny, another favourite of mine. This is a white jelly which becomes opaque in just 2 coats (maybe 3 on some nails). I find this is a much easier polish to apply than the creme white polishes such as OPI Alpine snow and looks really clean. The gold polish is one that I created myself. It made up of small gold and larger square gold glitters and also white square glitters which are much more apparent in real life!
I went further with this mani and free handed a Christmas tree on on middle finger, stripes on the ring finger and dots on the pointer finger (with hand placed gold glitter too). The star on the Christmas tree is a rhinestone purchased from ebay.
My favorite nail is the pointer finger with the dots!
The red polish used is Sally Hansen Lacquer Shine (red....I don't have the label) and the green is Essie Going Incognito (pointer, middle, ring). On the pinky I used a metallic green polish: Sally Hansen Emerald City from the Xtreme wear range. The red hearts are also a glitter.
I did the same Christmas tree on this manicure as I had accidentally created recently on another triangle mix and match nail art design. I prefer the original actually- what about you?
Next up is some simple snowflake nail art.
Snowflakes tend to look very complicated but really all they are is a few lines (ie do a cross and then 2 more lines to create an 8 sided star. The add 1 or 2 small dashes to the lines. You can put a dot in the centre of the snowflake with your background polish to mix it up). I used acrylic paint to paint the snowflakes and the blue polish is one I made myself, which I'm calling Midnight Snow. I absolutely love it!!
Next is another nail stamping design created with MoYou London plates- this one Pro Plate 01. I stamped in red with the Sally hansen metallic red which I have no name for (sorry!!!!) and then painted the green lines in Sally Hansen Emerald city. I did this over a base coat of Essie Marshmellow. Again I did this with the stamping decal technique although after I realized that I could have probably done it straight onto the nail.I have also entered this on in the MoYou competition. To vote please like and repin the image here. Thanks!!! xx
The next is a very subtle look inspired by Christmas sweaters ...although nobody here in Australia would ever be wearing a sweater at Christmas time- its often 40 degrees Celsius at this time of the year (over 100 f) !!!
I painted my nails with a nude polish- Essie Jazz which looks absolutely awful with my skin tone apparently!!! My fingers look grey haha. The design was handpainted with a gold polish- Essie Good as Gold. The ring finger is the same gold polish made by yours truly as previously :)
I think I like the thumb the best!
Update* And here is another Christmas nail design. See the whole post here :)
This last one is not strictly Christmas Nail art.....but I think anything in red and white adds a bit of Christmassy cheer to your nails! The full post with allll the details can be found here :)
Thanks so much for visiting. Merry Christmas!!
![]() |
![]() |
![]() |
![]() |
![]() |
Saturday, 7 December 2013
Dandelions at Sunset :)
These nails I'm posting today are actually for a few weeks back. My partner and I recently purchased a house and we got the keys last Friday so I have spent a week gardening and cleaning like a maniac. Digging in the dirt and scrubbing for hours with bleach isn't great for nail health and nail polish so I haven't done any nice manicures! I have somehow managed not to break any nails though!!! I was so worried I'd break my 1.5 year no break streak! *Knock on wood*
Anyway, I didn't manage to post this particular manicure at the time I was wearing it as that was in the week lead up to our engagement party and I had heaps of stuff to do! (I did have time to make my nails nice....just no time to post on the blog). I think it's a winner though!
I first painted my nails with Essie Tart Deco and then used a makeup sponge to make the gradient with Tart Deco, OPI Atomic Orange and China Glaze Heli-yum.
The dandelion is from a MoYou London plate- Kitty collection 02. I actually have 2 MoYou london plates with dandelions (also Pro 06), but the Pro 06 dandelions are too big to fit on my nails =(
I've wanted to do dandelion nails for a very long time. I think they are so pretty and I love having the little seeds flying off on the adjacent nails.
I used Konad stamping polish in black :)
I managed to take a quick picture of Essie Tart Deco by itself before I sponged on the gradient. It was so beautiful I wanted to show it off alone. I have been searching for years for this exact colour coral polish: not quite pink, not quite orange and slightly pastel. Holy Grail!!
I hope you have enjoyed this post :)
Thanks for visiting xx
Labels:
floral,
gradient,
mo you london,
stamping
Tuesday, 3 December 2013
Guess who bought more Moyou London plates?!!!
I recently ordered a few more MoYou London plates and they finally arrived! I got the Mother nature 02 plate (it's got lots of birds!) and Pro plate 01 XL. I was especially excited for pro plate 01 as I had been looking for one of the patterns for ages- Fat stripes!
I wanted to use it right away! I first painted my nails with a new polish acquisition of mine- Essie Mint Candy apple and then picked out a colour to stamp with. I thought that a coral would look nice and picked out China Glaze Flip Flop Fantasy. I had never stamped with it before and didn't think it would work, so I first stamped onto my scraping card and it showed up really well. I always do this with a polish I've not stamped with before instead of going straight onto my nails.
The camera had a bit of trouble capturing the vibrancy of the fluoro coral polish.
Once I had stamped the bird from Mother nature 02 (with konad dark blue stamping polish) the manicure instantly reminded me of a lovely manicure by Marta at Chit chat nails here. I'm going to call it accidental inspiration! I like hers better haha.
If you are very observative you will have noticed that I have the birds facing in different directions on the different hands (ie both birds facing my thumbs). To do this I used the technique below. I think it looks nicer if nail designs are opposite from each other. Of course you need two stampers for this technique- however if you have the konad two sided stamper you can remove the rubber from one side and stamp onto it. As you can see the XL stamper (white) doesn't pick the image up as crisply as a konad stamper.
Thanks for visiting :)
Tuesday, 26 November 2013
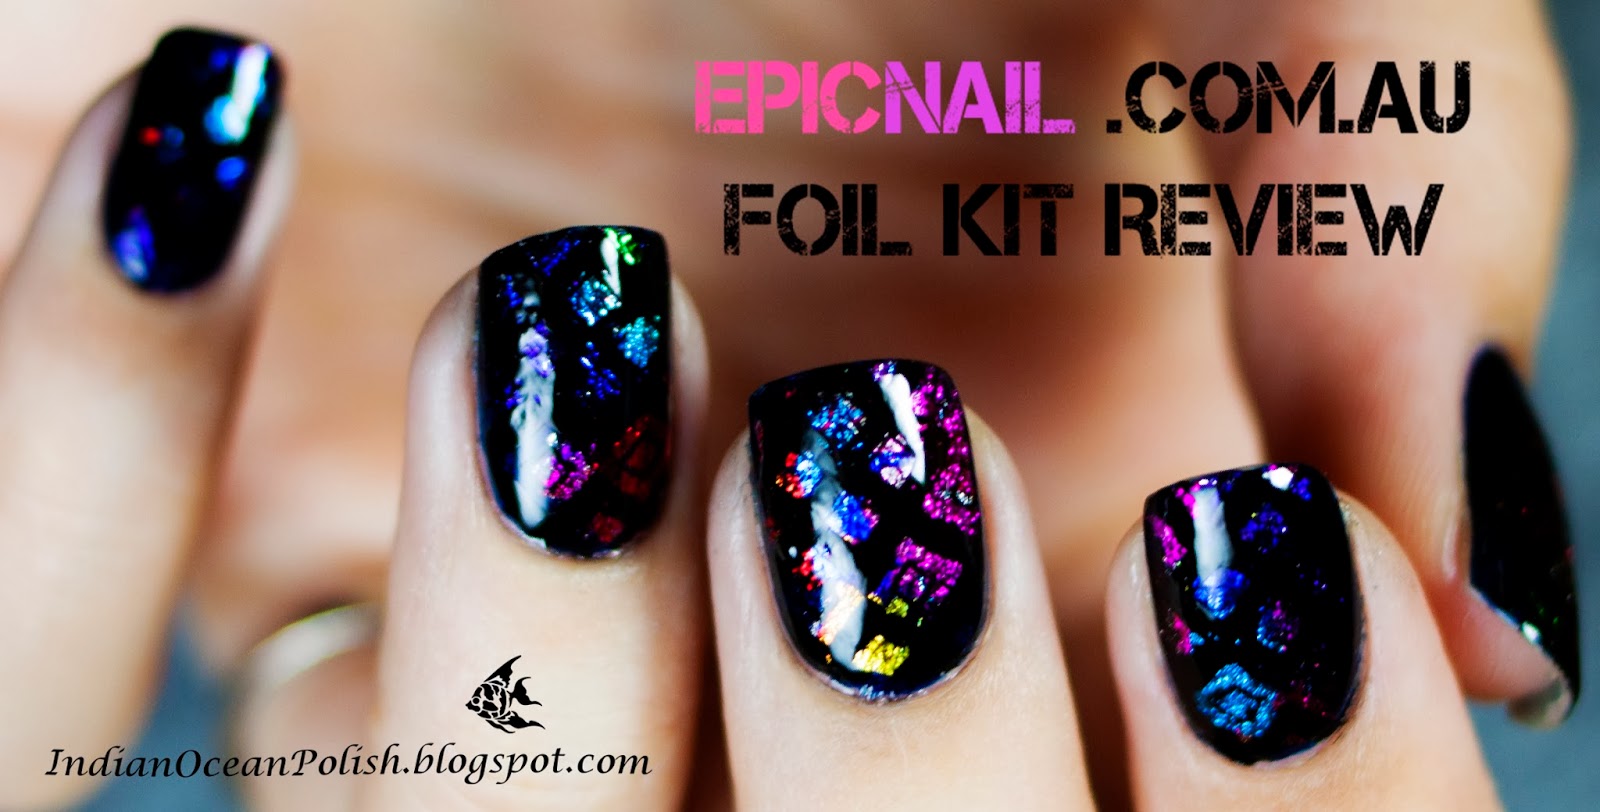
Review: Epicnail New Nail Foil Kits! "Essentials"
I have a huge post for you today! I was recently contacted by EpicNail.com.au to give an honest review of their new nail foil kits. These kits contain 6 rolls of nail foil, a bottle of nail foil adhesive, wooden cuticle pushers and instructions. There is also an ultimate kit which has 36 rolls of foil, 2 bottles of glue and cuticle sticks. The foils and glue can also be purchased separately.
The 6 foil kits retail for $73.98 AUD, however they are currently on sale for 50% off.
Epic Nail is an Australian owned and operated business that prides itself on its high quality products and excellent customer service. They offer same day dispatch to Australia and New Zealand on all orders, and a 30 day money back guarantee on all products.
Out of the four available kits I chose the 'essentials' kit' as it seemed to have a bit of everything (In the jungle, I heart you, nautical, pipe dream, winter is coming, all laced up.....see chart below) . In addition to the kit, they also sent me two extra foils- marble and floral delight as I saw them on the colour chart and really wanted to try them too.
The kit arrived within 2 days of being sent, packaged in a stylish white box. Each foil comes as a roll in it's own jar, and there is about 1 meter per roll at a width of 3.8cm. Apparently each kit has enough foil for at least 60 manicures (ie. 10 per roll) which seems about right as I used 5cm per hand approximately.
I was going to make a tutorial of how to use nail foil transfers, but there is a great one on their website already which I have copied below :)
Just a note- they talk about using the foils over shellac, but they can be used over normal polish or even bare nails.
I was going to make a tutorial of how to use nail foil transfers, but there is a great one on their website already which I have copied below :)
Just a note- they talk about using the foils over shellac, but they can be used over normal polish or even bare nails.
The first few foils I tried didn't transfer completely. I didn't wait long enough for the glue to dry- you really need to wait for it to go completely clear (and then another 10 seconds to be sure!). Once I figured this out I had very few problems. Some were easier to use than other- the In the Jungle foil practically jumped onto my nails, and the Nautical stripes were a little tricky......anyway- I'll go through them one by one :)
First up we have 'Winter is coming'- is that a reference to Game of Thrones? This is a silver holographic foil with a subtle diamond pattern. This is where I learnt my second lesson in foil application. Quick dry top coat is a no no! In the picture below I used seche vite on all nails but the thumb before I realized it was ruining the finish! This phenomenon seemed to be most obvious with this foil as I used the same top coat with the rest and didn't seem to have a problem. This foil was very easy to apply- I did it over bare nails which meant this look was achieved in about 5 minutes! So quick and easy!!!
Oh and lesson 3: I found that pulling the foils off quickly rather than slowly gave me a much easier application.
And I re-did the 'Winter is coming' without top coat so you could see the full holographic effect. I don't think you can achieve anything this shiny with nail polish. It truly is stunning. I felt quite futuristic!
Oh and did I mention?- there is practically no clean-up as the foil only applies where you put the glue!
I decided to try stamping over the foils too. (If you are unsure on what nail stamping is visit my tutorial and guide to stamping here). I used a stamp from the cheeky happy plate using konad stamping polish in black. As you can see it worked beautifully and I really like the look of black stamping over the holographic shiny shiny silver!
Next up is 'I heart you', a hot pink foil with holo silver hearts. This one applied relatively easily, however I did have trouble getting it all the way to the edges and had to re-apply (ie add more glue and line up the foil over the top to re-cover the bald spots). I think it's quite pretty, but definitely not my favorite.
And here is my equal top favorite..... 'Pipe dream'. This is what the foil looks like- which isn't obvious from the mani. It's lots of blobs and gradients with many different metallic colours.
Here it is applied directly to the nail- pretty cool huh..... but keep reading as I tried a different application technique as well.
For this manicure I first painted my nails with a dark metallic blue- Essie Midnight Cami. After it had dried I put small dots of foil glue onto my nails and applied as before- this revealed small spots of foil- I then repeated the process until most of the nail was covered (2 or 3 applications).
I looooved how this looked! It looked so deep, shiny and colourful!
I thought it might look cool to stamp these with a black as well. I used another design from the Cheeky happy plate. So mysterious!
And after one of my favorites- the foil I had the most trouble with application, 'Nautical'. Well really the only one that didn't apply easily. This foil was different from the others as it was clear, with the red, silver, blue and white lines. Therefore you get to choose what color to put underneath and have show through. I chose a grey polish- Misa "Grey matters'. As you can see I had trouble getting the foil to apply all the way to the edges, and some of the lines have bits missing. I think the manicure still worked out all right though- I'm just a perfectionist!
Next is 'all laced up'. I applied it over a silver polish on some nails, and bare nails on other- you can't really tell which is which as it applied very easily without bald patches. This is a black lace design with holographic silver background. I'm a fan of this design! I think it would be nice for a special night out.
Ok and the last foil in the "essentials' kit before I move onto the two extras that I picked out.
This is 'in the jungle' and as I said earlier was super easy to apply. If you are trying foils for the first time I recommend starting with this one :)
As you can see the background is a holo silver which flashes with rainbows in the light :)
Ok, now that concludes the essentials kit. These next two foils were kindly added as extras for me. You can purchase all foils separately for 4.99$ each (On special currently down from $9.99).
This was actually the first foil that I tried out so the application isn't perfect- but it wasn't troublesome at all, so I think when I try again it will be an easy application. This, like 'nautical' is a foil designed to be put over a coloured polish as it doesn't cover the whole nail and has clear patches. You can hold the foil up against different bottles of polishes to decide which colour will match!
I'm a big fan of how this floral foil looked. The only issue will be that a lot of the foil is clear space, or just leaves, so if you want each nail to have a flower you may not get the total 10 manicures out of the roll.
I applied over China Glaze 'For Audrey'
Ok and last, but definitely not least (in fact my other favorite) is 'Marble'. This is a beautiful subtle foil that looks like a marble surface, or even mother of pearl. Its not as shiny as the others, but I found it absolutely beautiful with the marbled mint, blues and pinks.
For the feature nail I cut the foil into a heart and stuck that on over OPI Thanks a Windmillion. I put the whole foil heart on- ie I didn't transfer it off the plastic.
So that's all of them! All in all I found these nail foils to be fun, quick and easy. If you love nail art, but don't have time these are perfect. Also I don't think you can beat foils for shine. They weren't completely full proof however. Make sure you follow the instructions and you shouldn't have too many problems, but some are definitely easier to apply than others. The foil application glue worked well, but I wish there was more... I don't think the one bottle will last for 60 manicures. It can be purchased separately on the website though.
So what do you think of this foil kit? Have you tried foils before or would you like to try them?
You can purchase the kits and foils from http://www.epicnail.com.au/shop/nail-transfer-foil/nail-art-transfer-foil-colours.
As a special offer, you can get free standard shipping on orders over
$30 until the 31st December 2013 by using the discount code 'BLOGOCEAN'.
This products were provided to me free of charge for review and my honest opinion by EpicNail.com.au. No editorial input from EpicNail was made.
Subscribe to:
Posts (Atom)